Model 3 Ham Radio Install
This post details the ham radio installation in my Tesla Model 3.
I desired a two-way radio in my Model 3. How was I to accomplish this? Surely it was as simple as wiring to the 12V battery and picking a suitable antenna mounting location, no? Another like-minded ham with a remakably similar vehicle made a video of his install, but I did not want to put the antenna in the front with that particular antenna mount. After much research, observation, and experimentation, I learned:
It is unwise to connect accessories directly to the 12V battery in the frunk1. Apparently the vehicle attempts to account for all battery drain, and when it can’t explain some, it throws an error saying the battery needs service. I did not want to risk that as the nearest service center isn’t yet complete.
I would need to connect to switched 12V power at VCLEFT with a 4.8mm female quick disconnect terminal to provide up to 15A of current.
The vehicle has no fuse box.
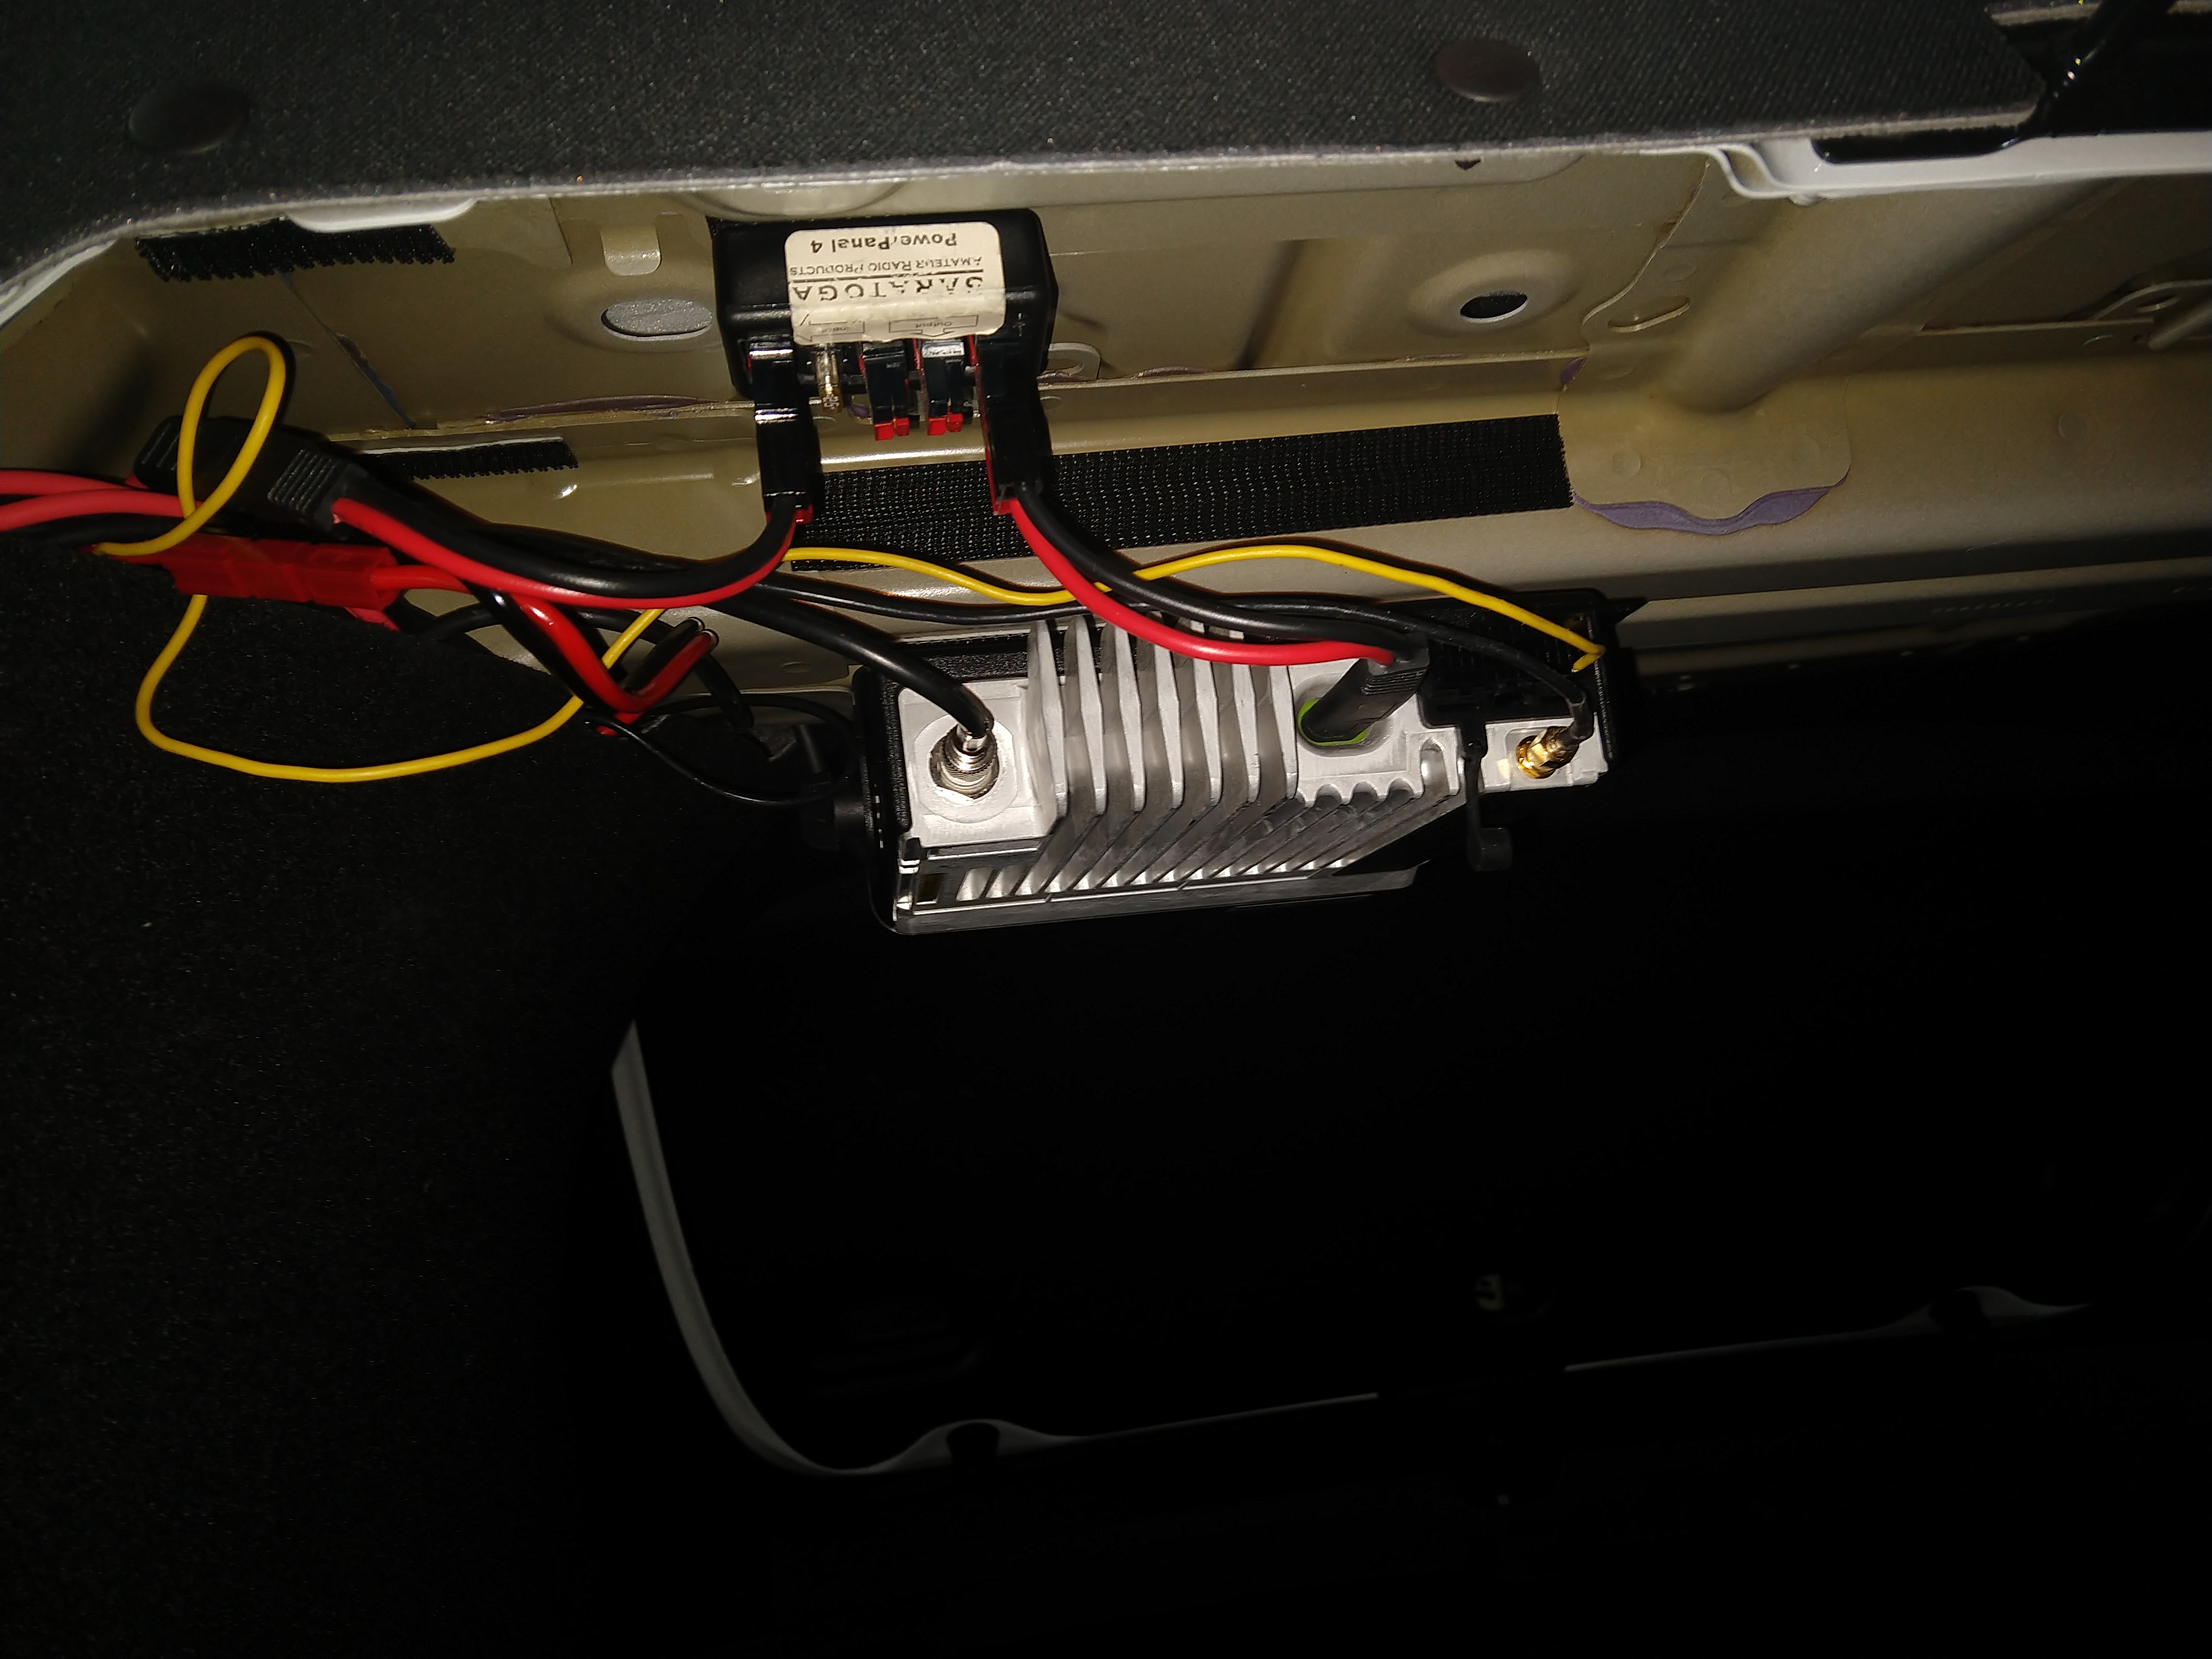
The radio I wanted to use, the XPR5550e, does not like being on switched power, so I would need a source of constant 12V power, which I located underneath the rear passenger seat thanks to this video.
Interior challenges for the Model 3:
- The dash is clean and sleek and there is no good place to mount a remote control head and/or microphone without it looking tacky.
- Inside the center console is not wide enough to mount a remote control head for the radio I wanted to use.
Exterior challenges:
- The entire roof is tinted glass. Drilling is out of the question and a through-glass surface-mount antenna is not an option due to the UV and IR coatings.
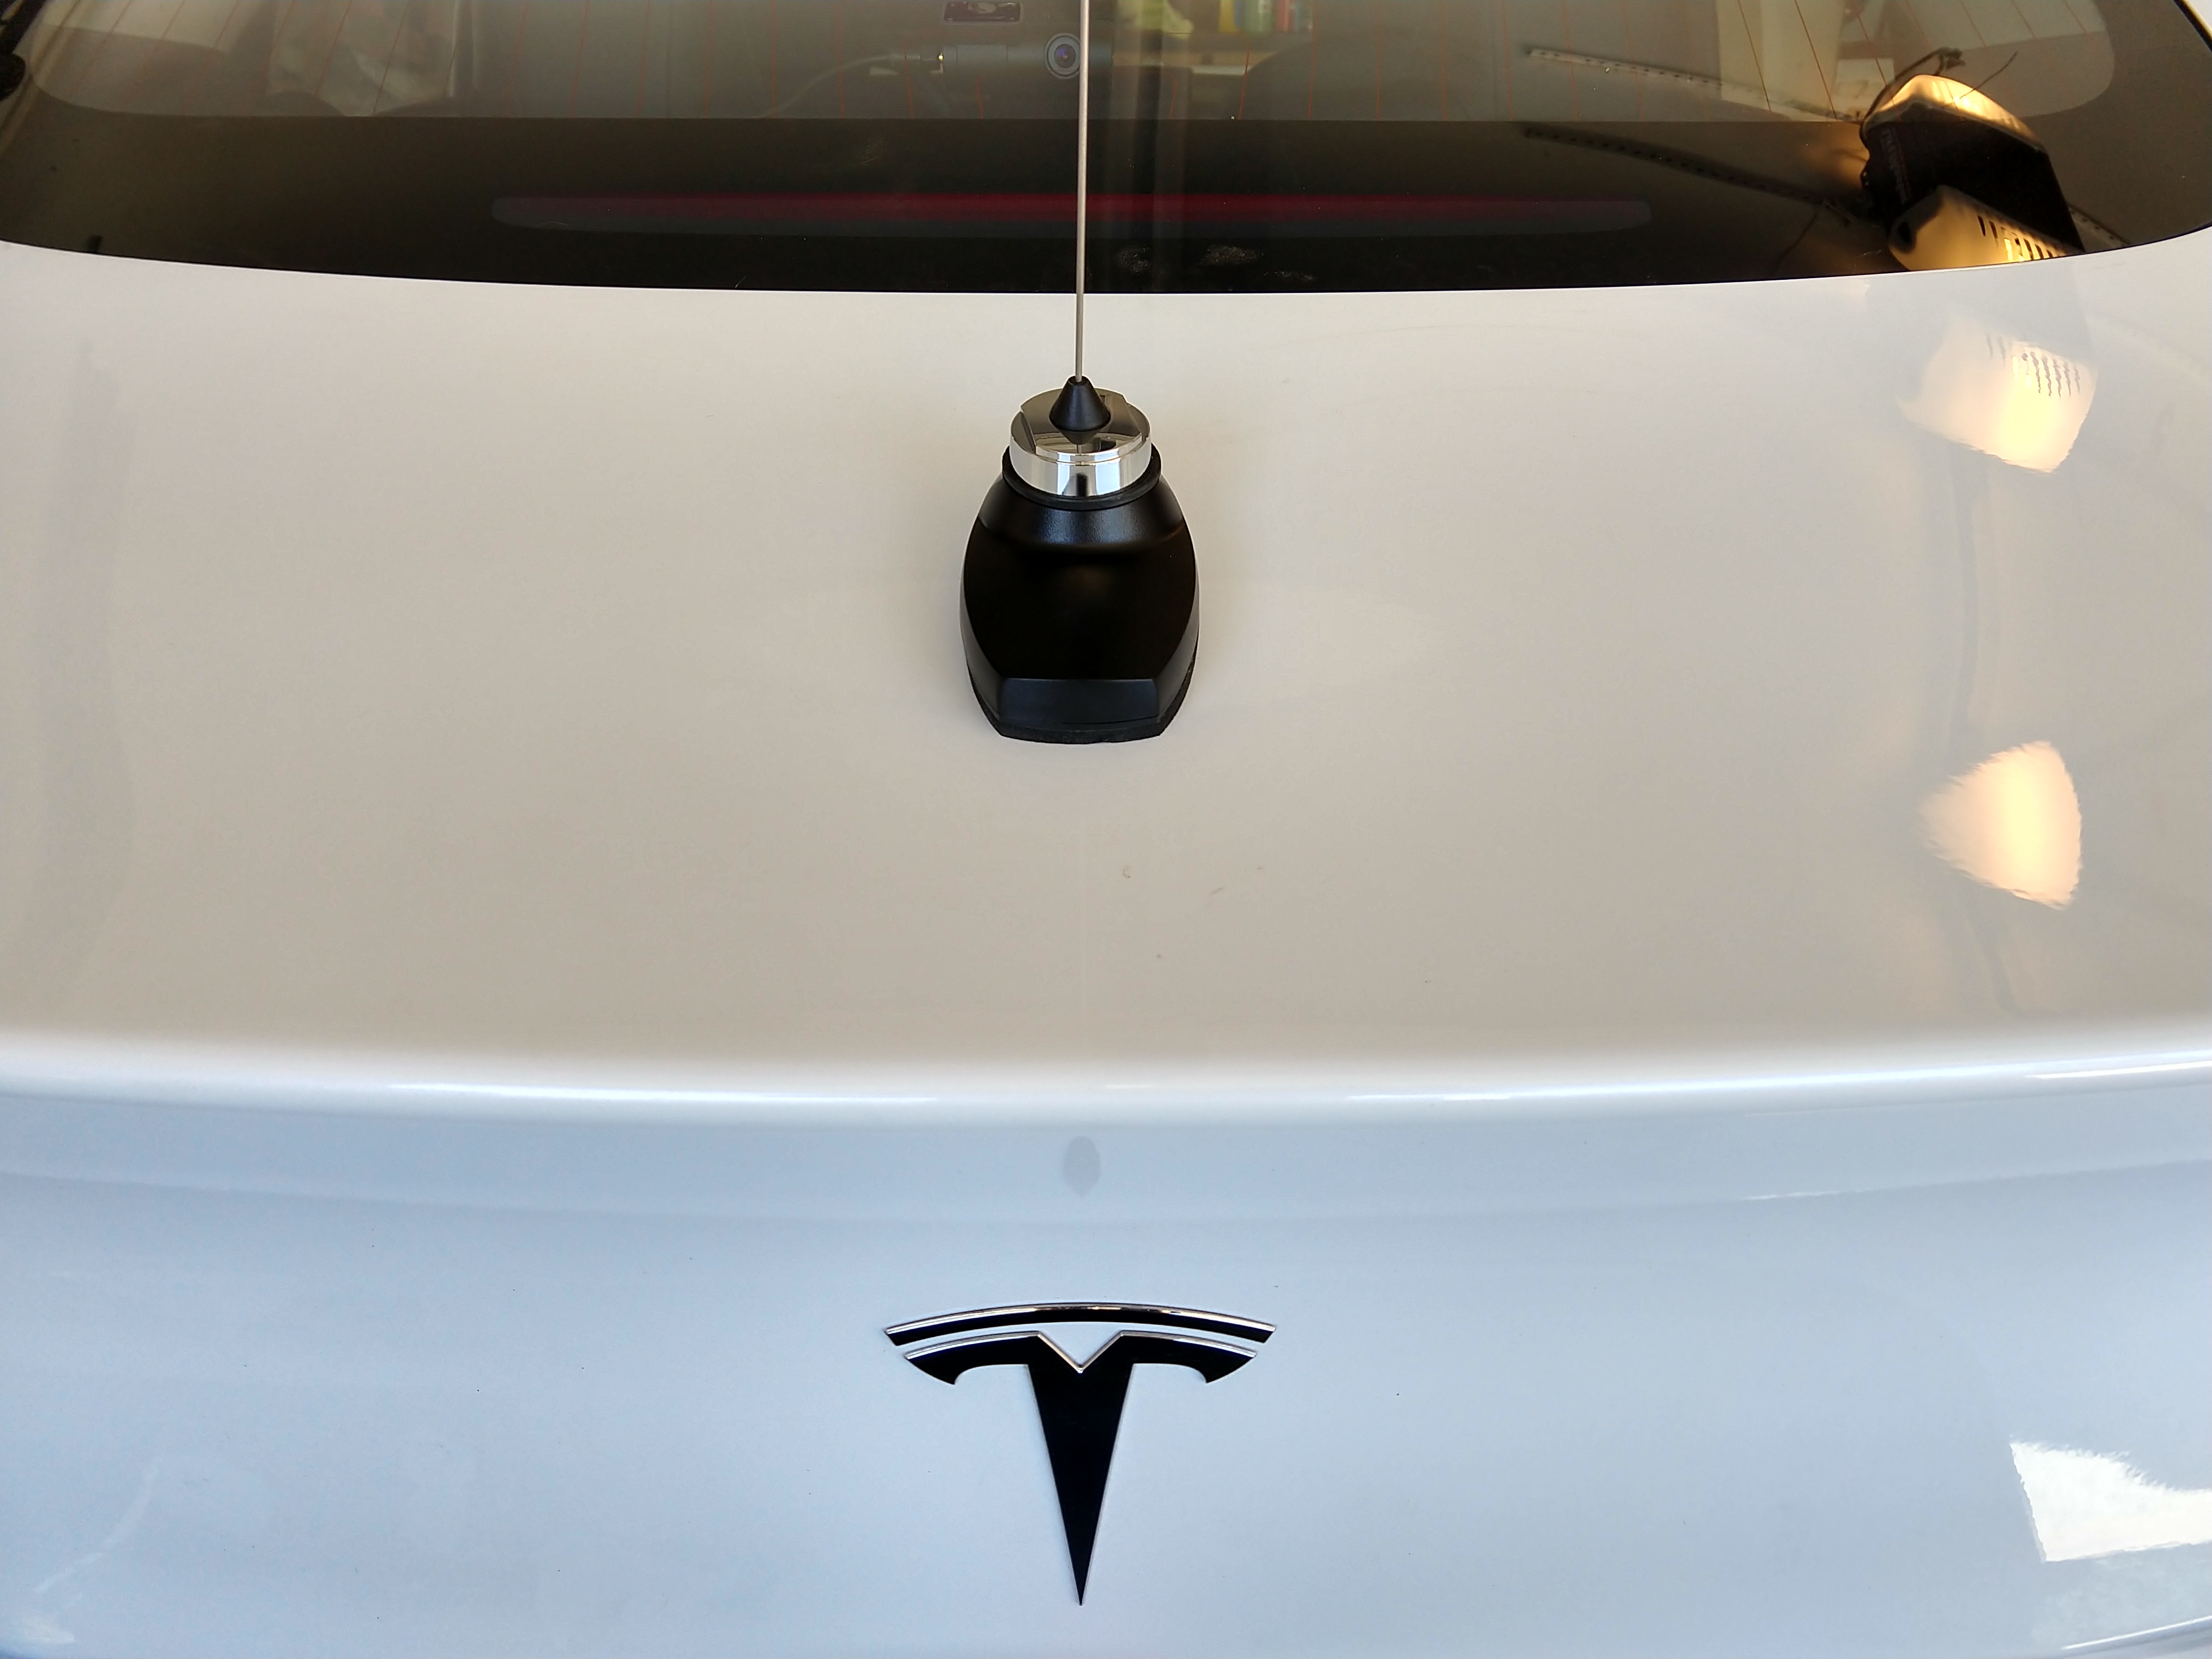
I decided on a permanent antenna installation. After owning several vehicles over multiple decades, the “temporary” trunk lip-type antenna mounts are anything but, and mag mounts always scratch. So I might as well drill a hole and make it look good. The only option for drilling was on the trunk lid since there was no metal roof.
I decided to attach a handheld control head (HHCH) to the XPR5550e and use the 5m extension cable to connect to the radio in the trunk. I would then place the HHCH inside the center console and place the mic clip in one of the cell phone charger areas. This would provide easy access to the radio, as well as the ability to completely hide the control head when not in use by unclipping it and storing it in the center console. Additionally it would not preclude the use of a 2nd cell phone while the radio control head was unclipped and hidden in the center console.
Center Console
The first task was to remove the center console in order to drill the hole for the HHCH cable. I started disassembling the console piece-by-piece until I learned that you could remove the entire console by removing 6 bolts, 2 screws, and 2 cables. The console lifted out easily and this made working on it much easier.
I ran the HHCH cable to the rear part of the console where the rest of the wiring connects to the car. I also ran a ground wire to that area, as well as an additional power wire for future expansion. 😉
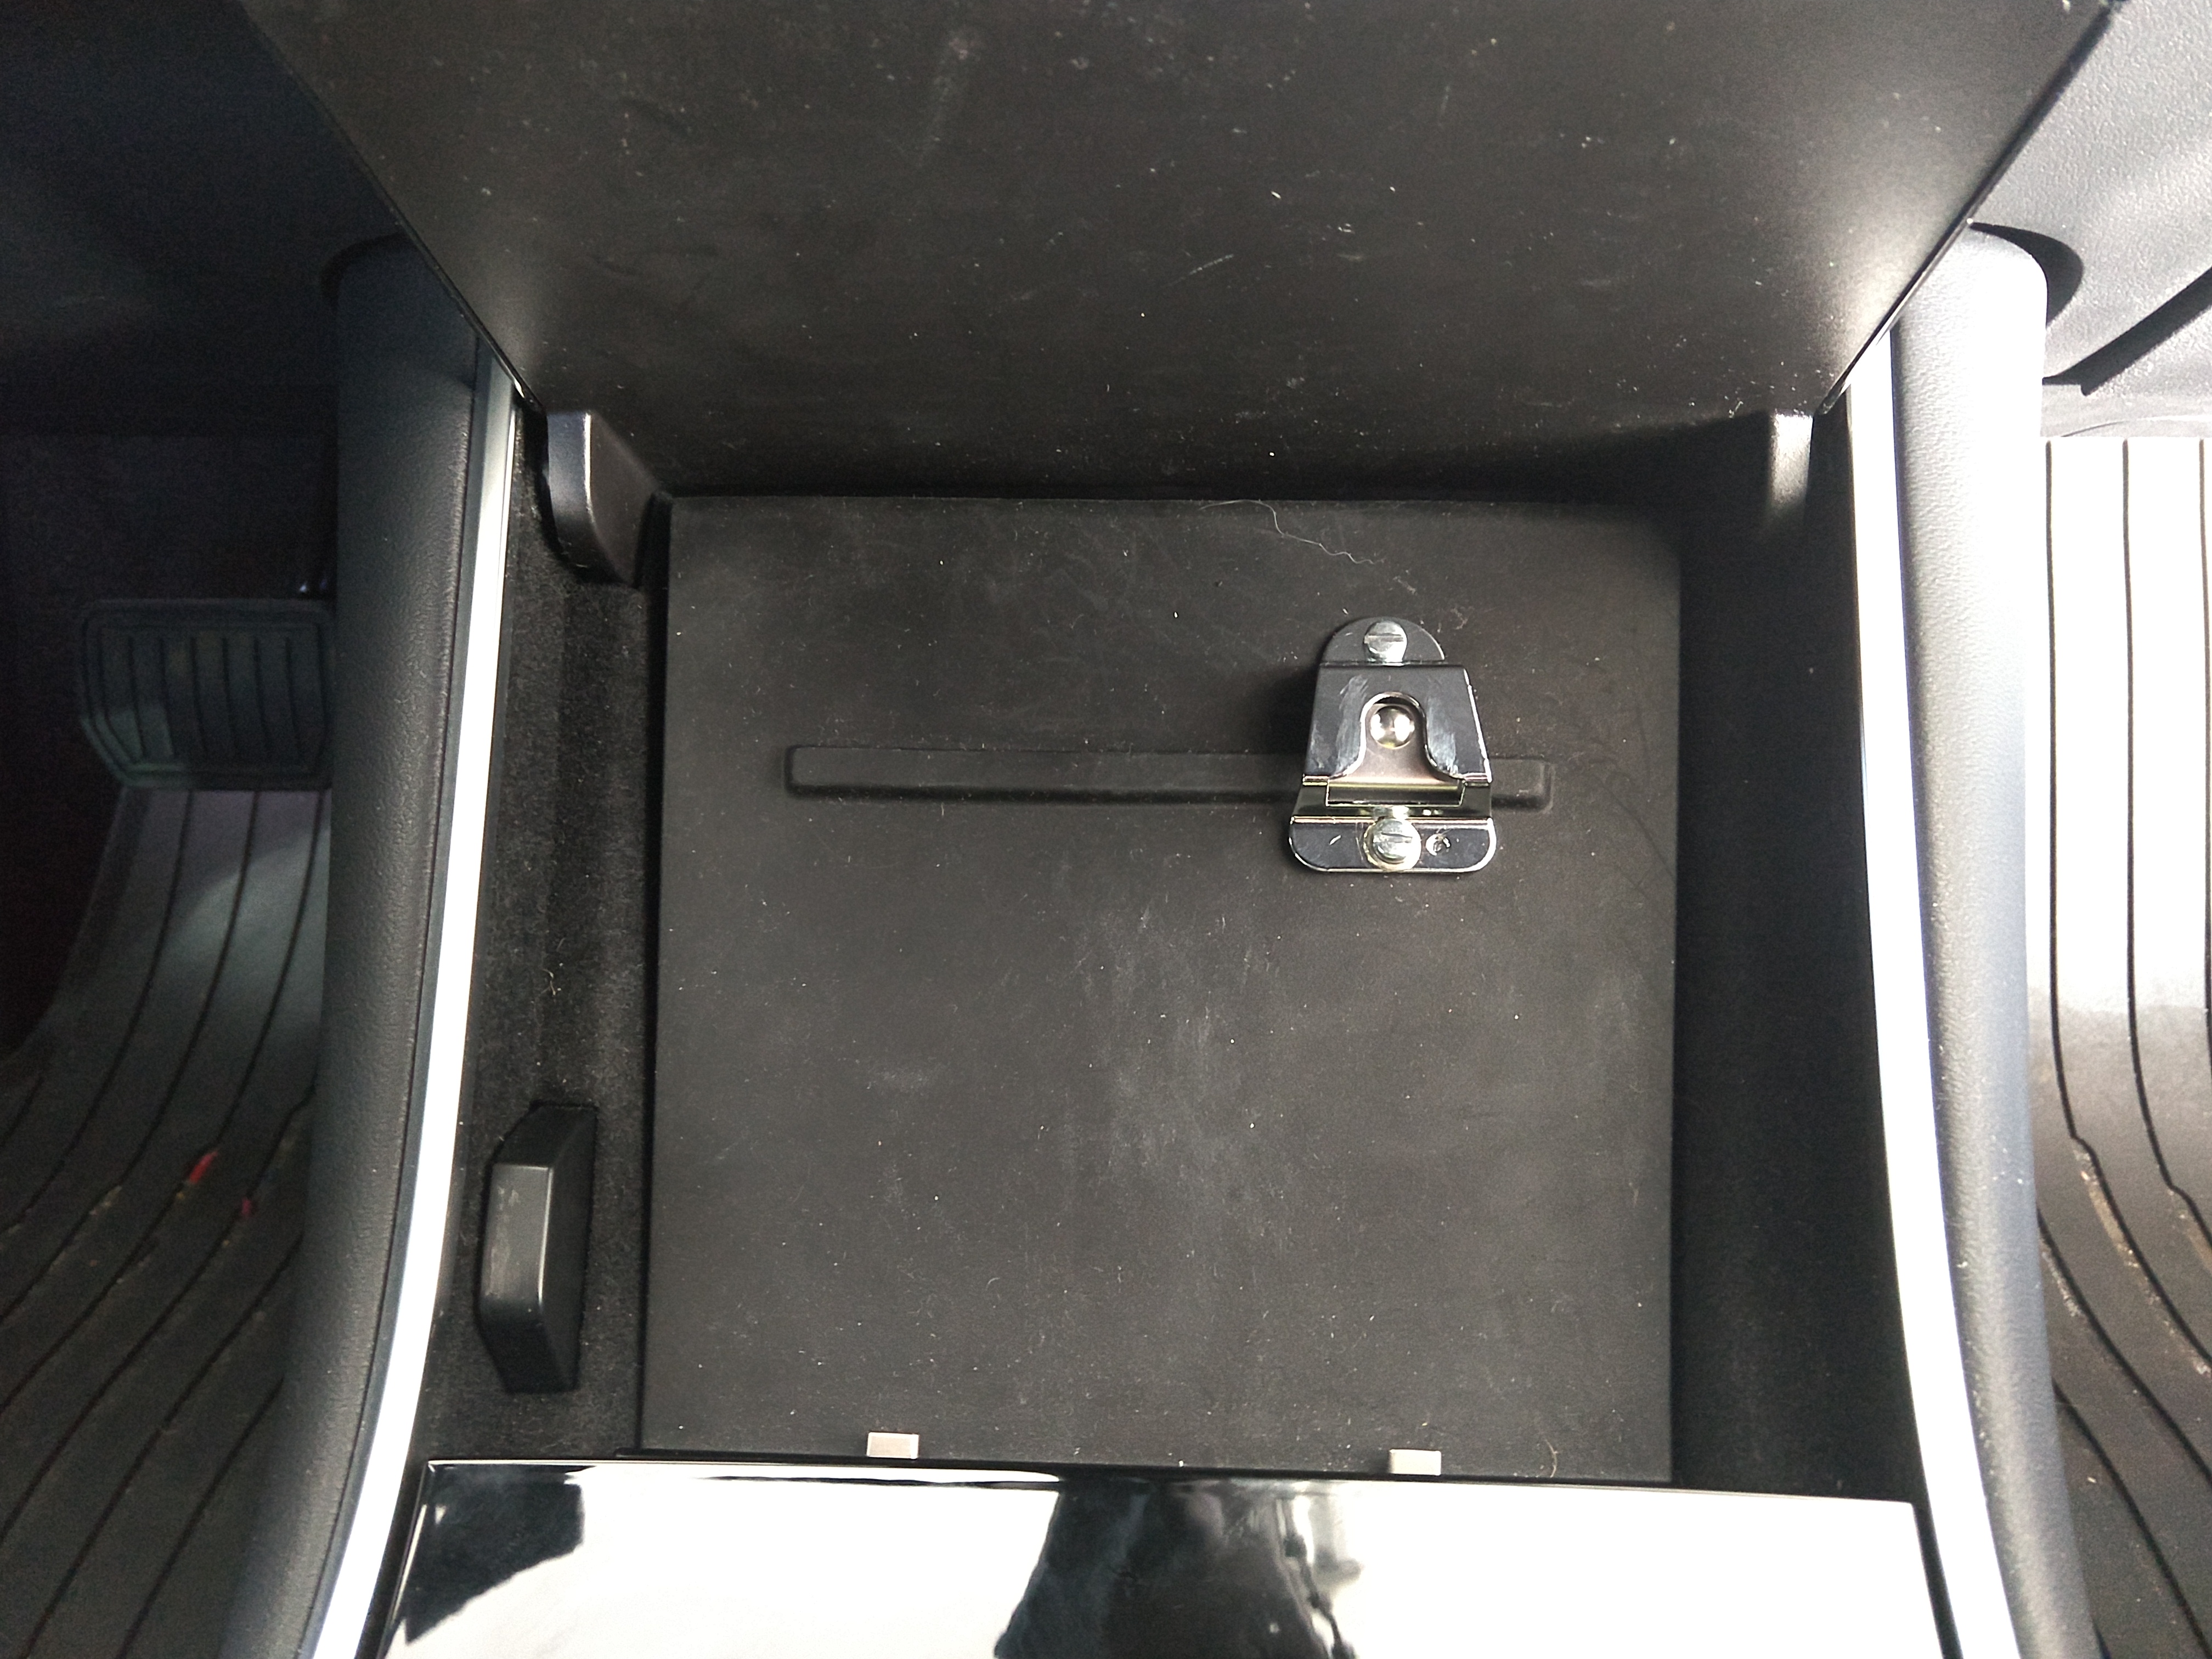
The hole is 1 1/8" and directly next to the USB plugs, as per this owner’s installation. I pulled the cables through a rubber grommet and installed the grommet into the hole in order to protect both the cables and the console. The mic clip for Motorola radios needs to be grounded in order for the radio to sense when the mic is off-hook. The ground wire is connected to the mic clip mount underneath the rubber cell phone holder pad. I had to use aluminum tape on the ground ring terminal to make an electrical connection.
The HHCH clips upwards into the mic clip and prevents the cell phone holder cover from closing, so it is necessary to remove the HHCH and store it in the console when the radio is not in use (if you want to close the cell phone compartment door).
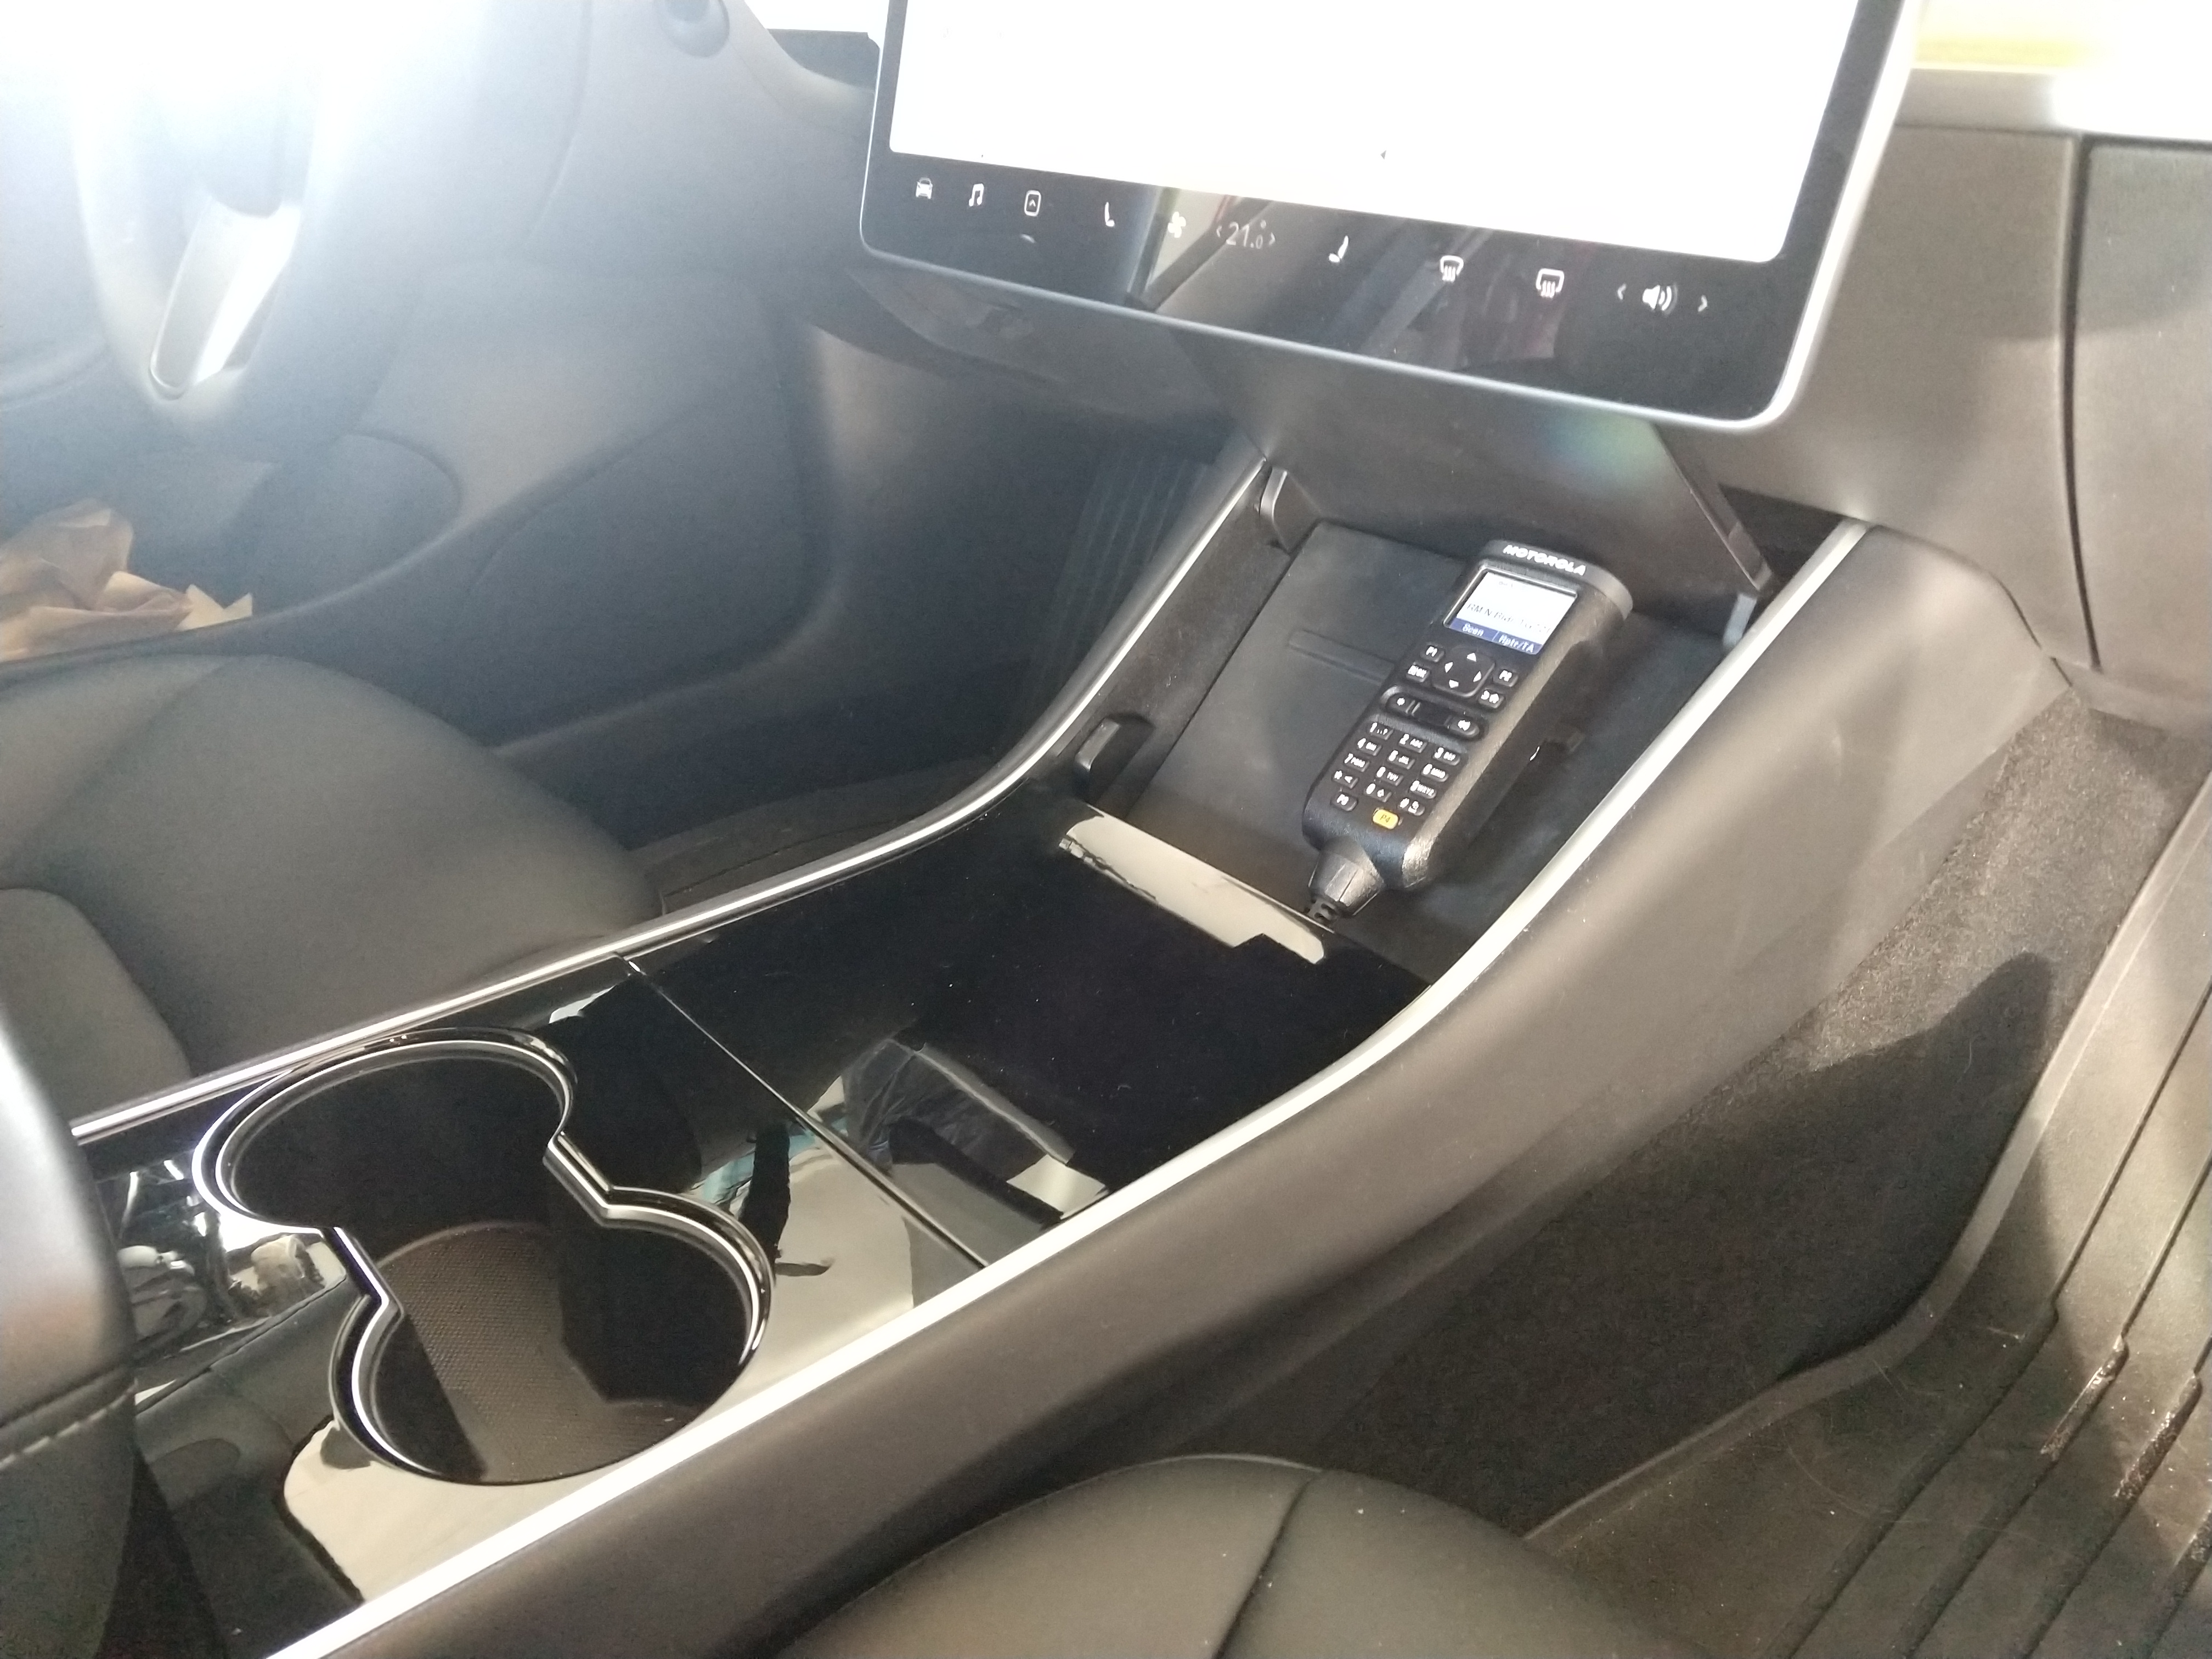

Because the HHCH contains its own speaker, there was no need to mount an external speaker, although that is certainly a future option for better audio. The center console would easily accomodate an external speaker.
Trunk Radio
The radio body is located in the trunk, connected to the cross-beam that traverses the trunk area. It is located on the passenger side, because that side of the split rear folding seat is the shortest (the “40” of the 60/40 split bench). This way it will not obstruct objects that require the larger portion of the rear seat to be folded down.
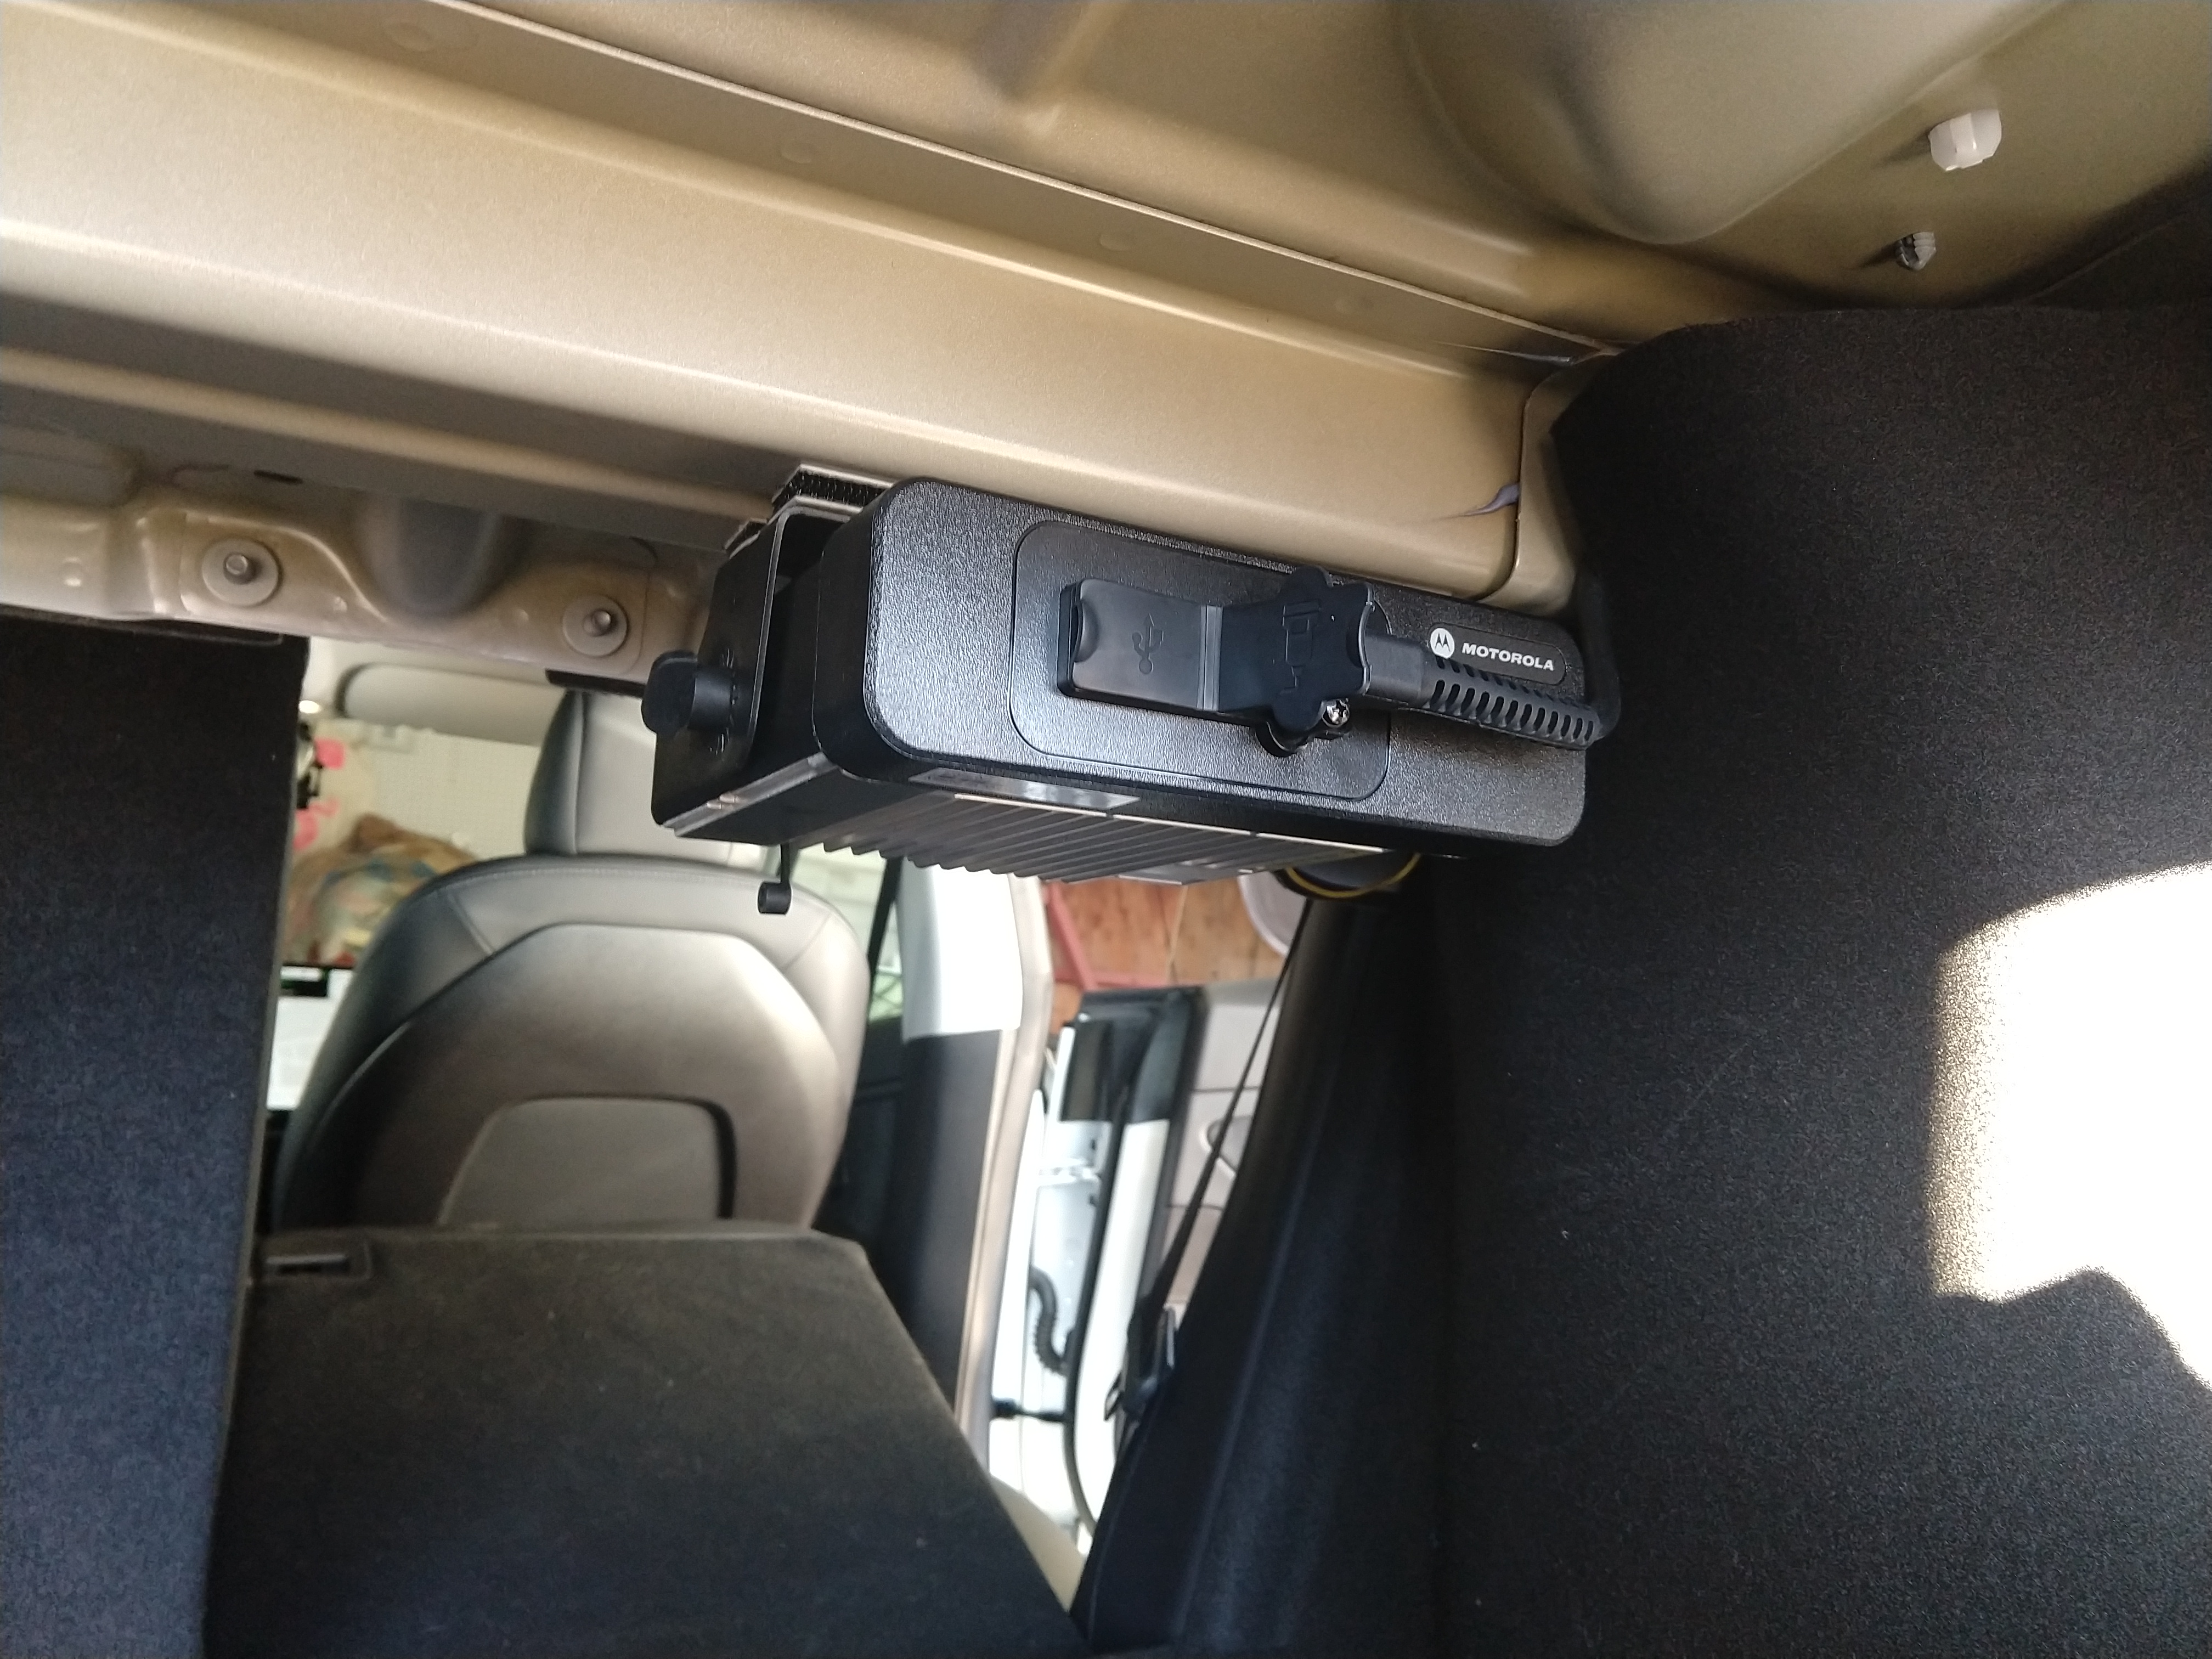
It also makes for easy access to the rear connectors of the radio simply by folding down the passenger side rear seat.
Trunk Lid Antenna
Antenna Base
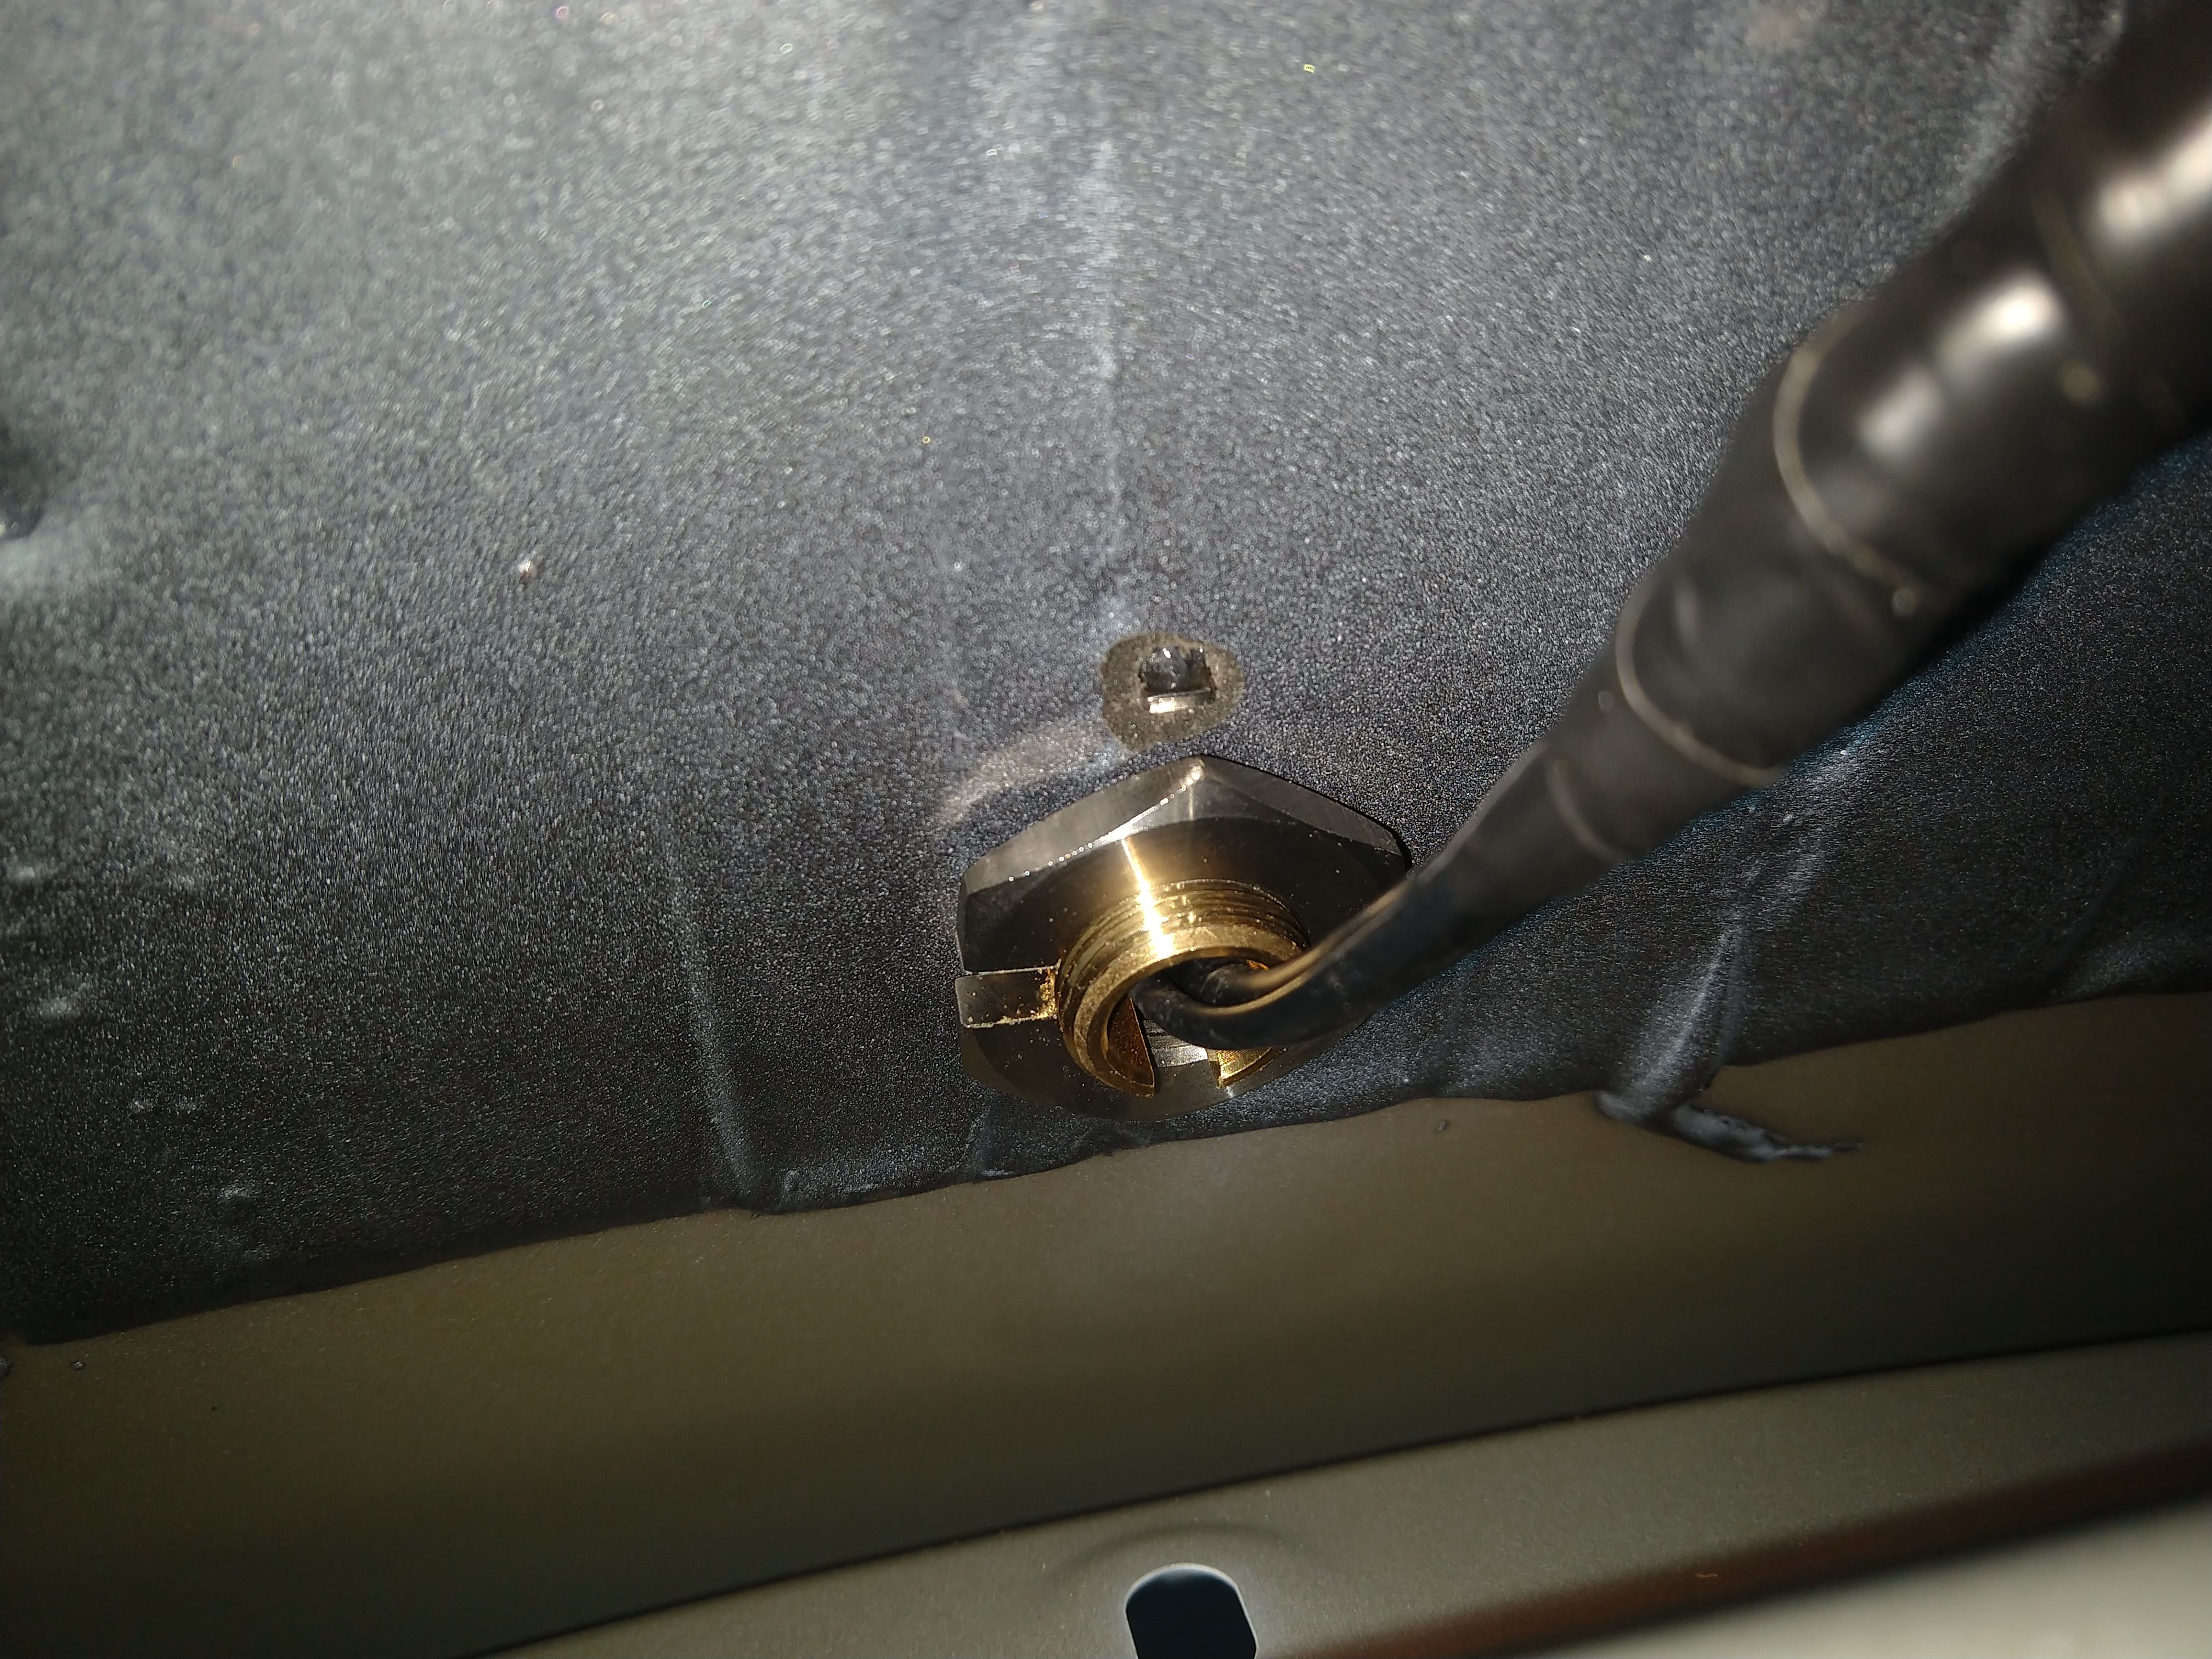
By far the most emotionally difficult task was drilling a hole in the trunk lid of a brand-new shiny car. However I am pleased to report that not only does it function very well, it looks quite decent and is by far my best mobile antenna install to date.
Fortunately Tesla chose to reinforce the center of the trunk lid with some extra material, and it made for an exceptionally strong base for mounting the antenna. Make sure to check the ground connection between the antenna base and the vehicle body before closing it all up.
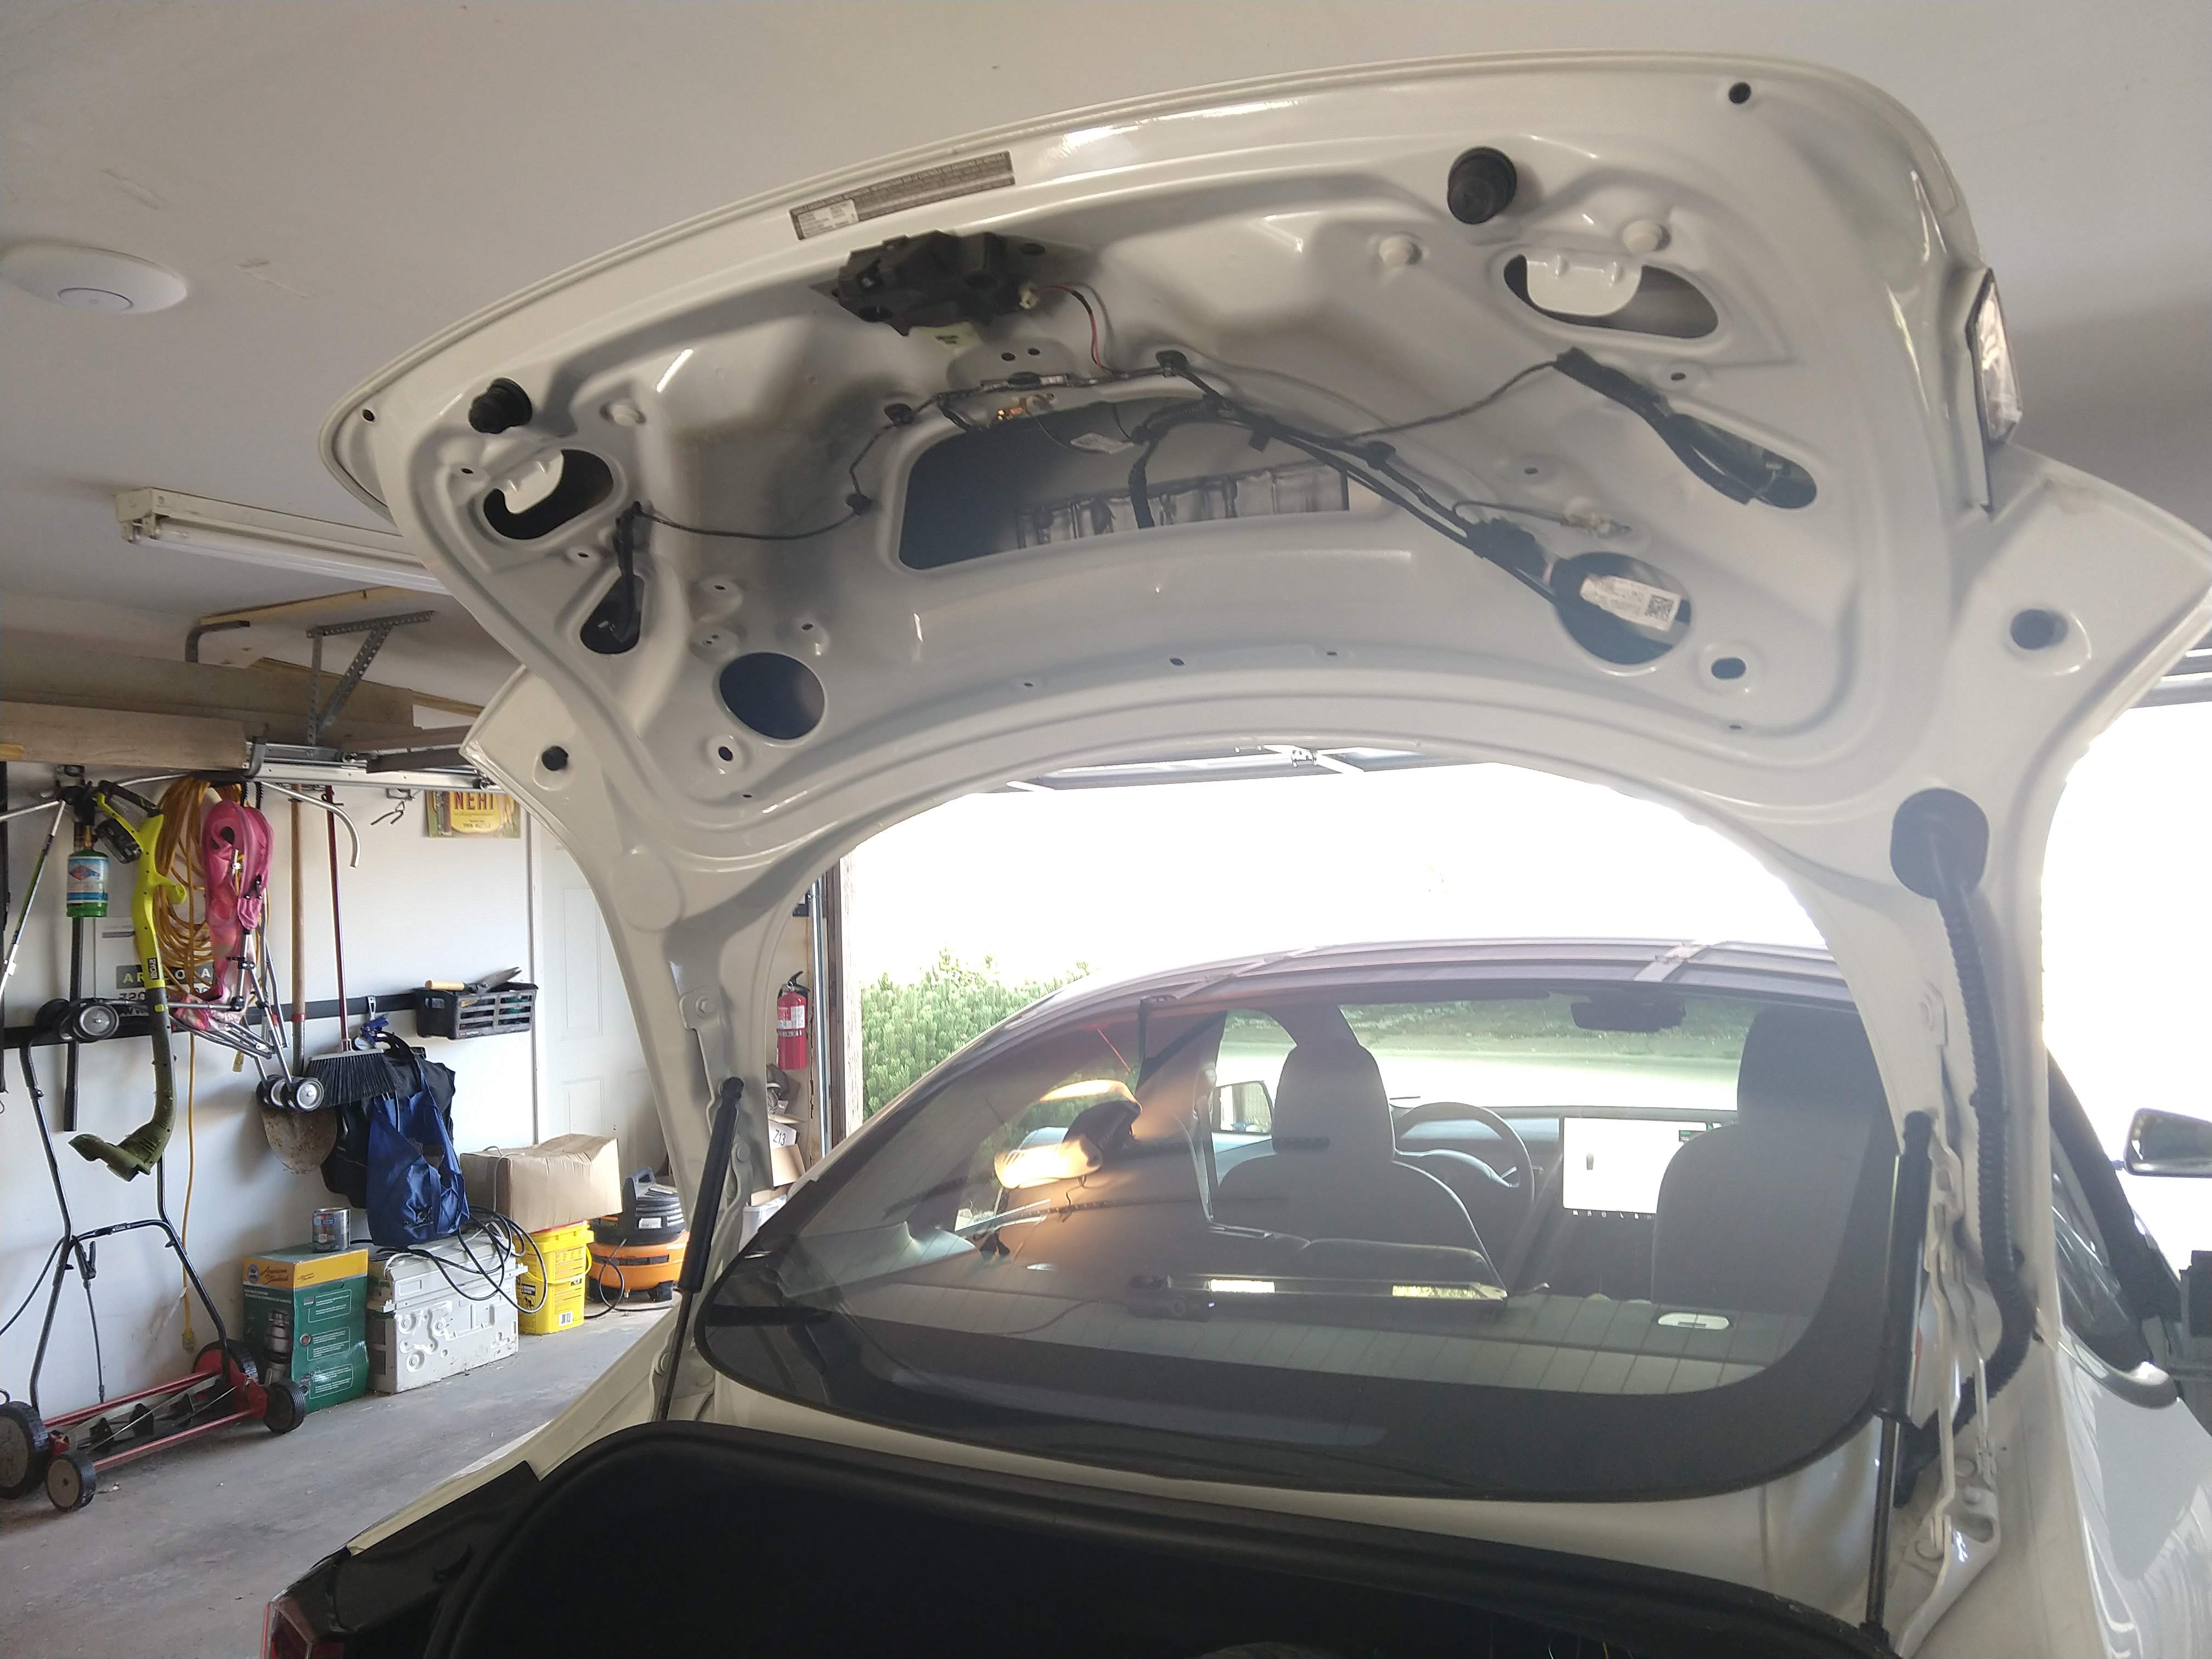
Removing the trim was the hardest part of installing the antenna base. The clips are very tight and do not come out of the sheet metal like they should, so several of them may break. It may be wise to have a few spares on hand. It is also wise to check for any loose parts or pieces that may have fallen into the lid cavities to prevent any rattling when opening or closing the trunk.
⚠️ Remember to protect the coax where it may rub against the metal.
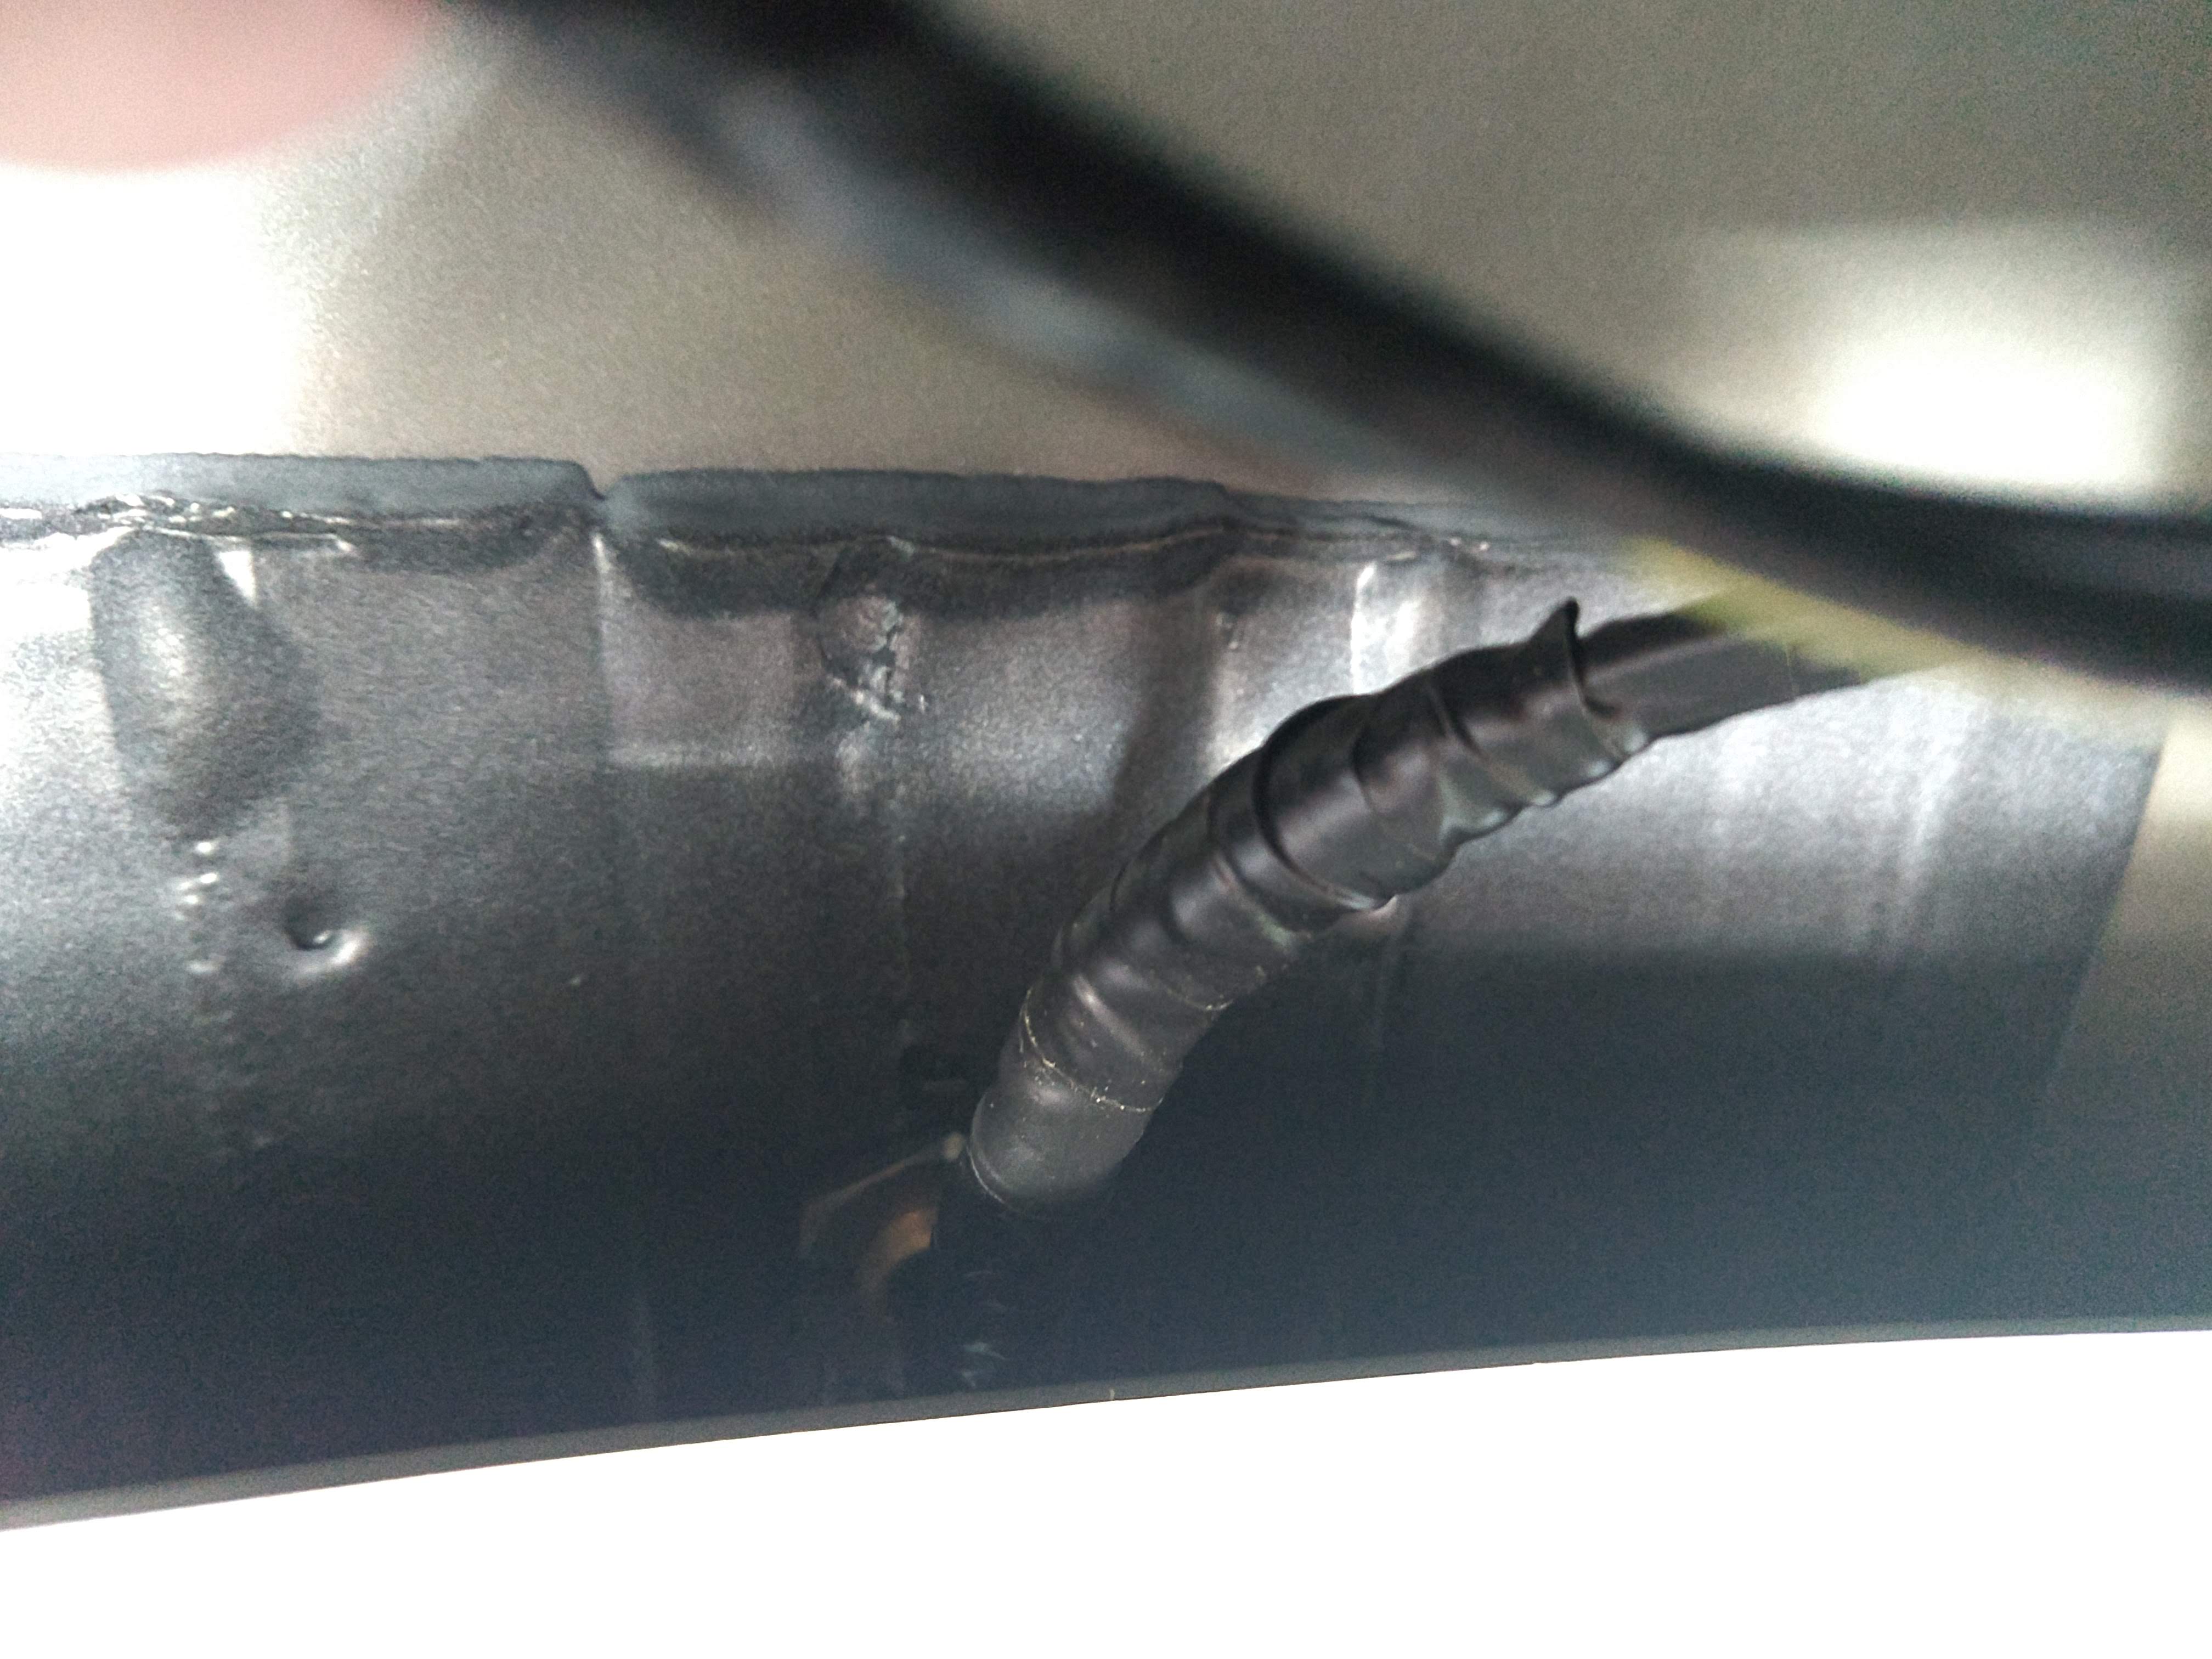
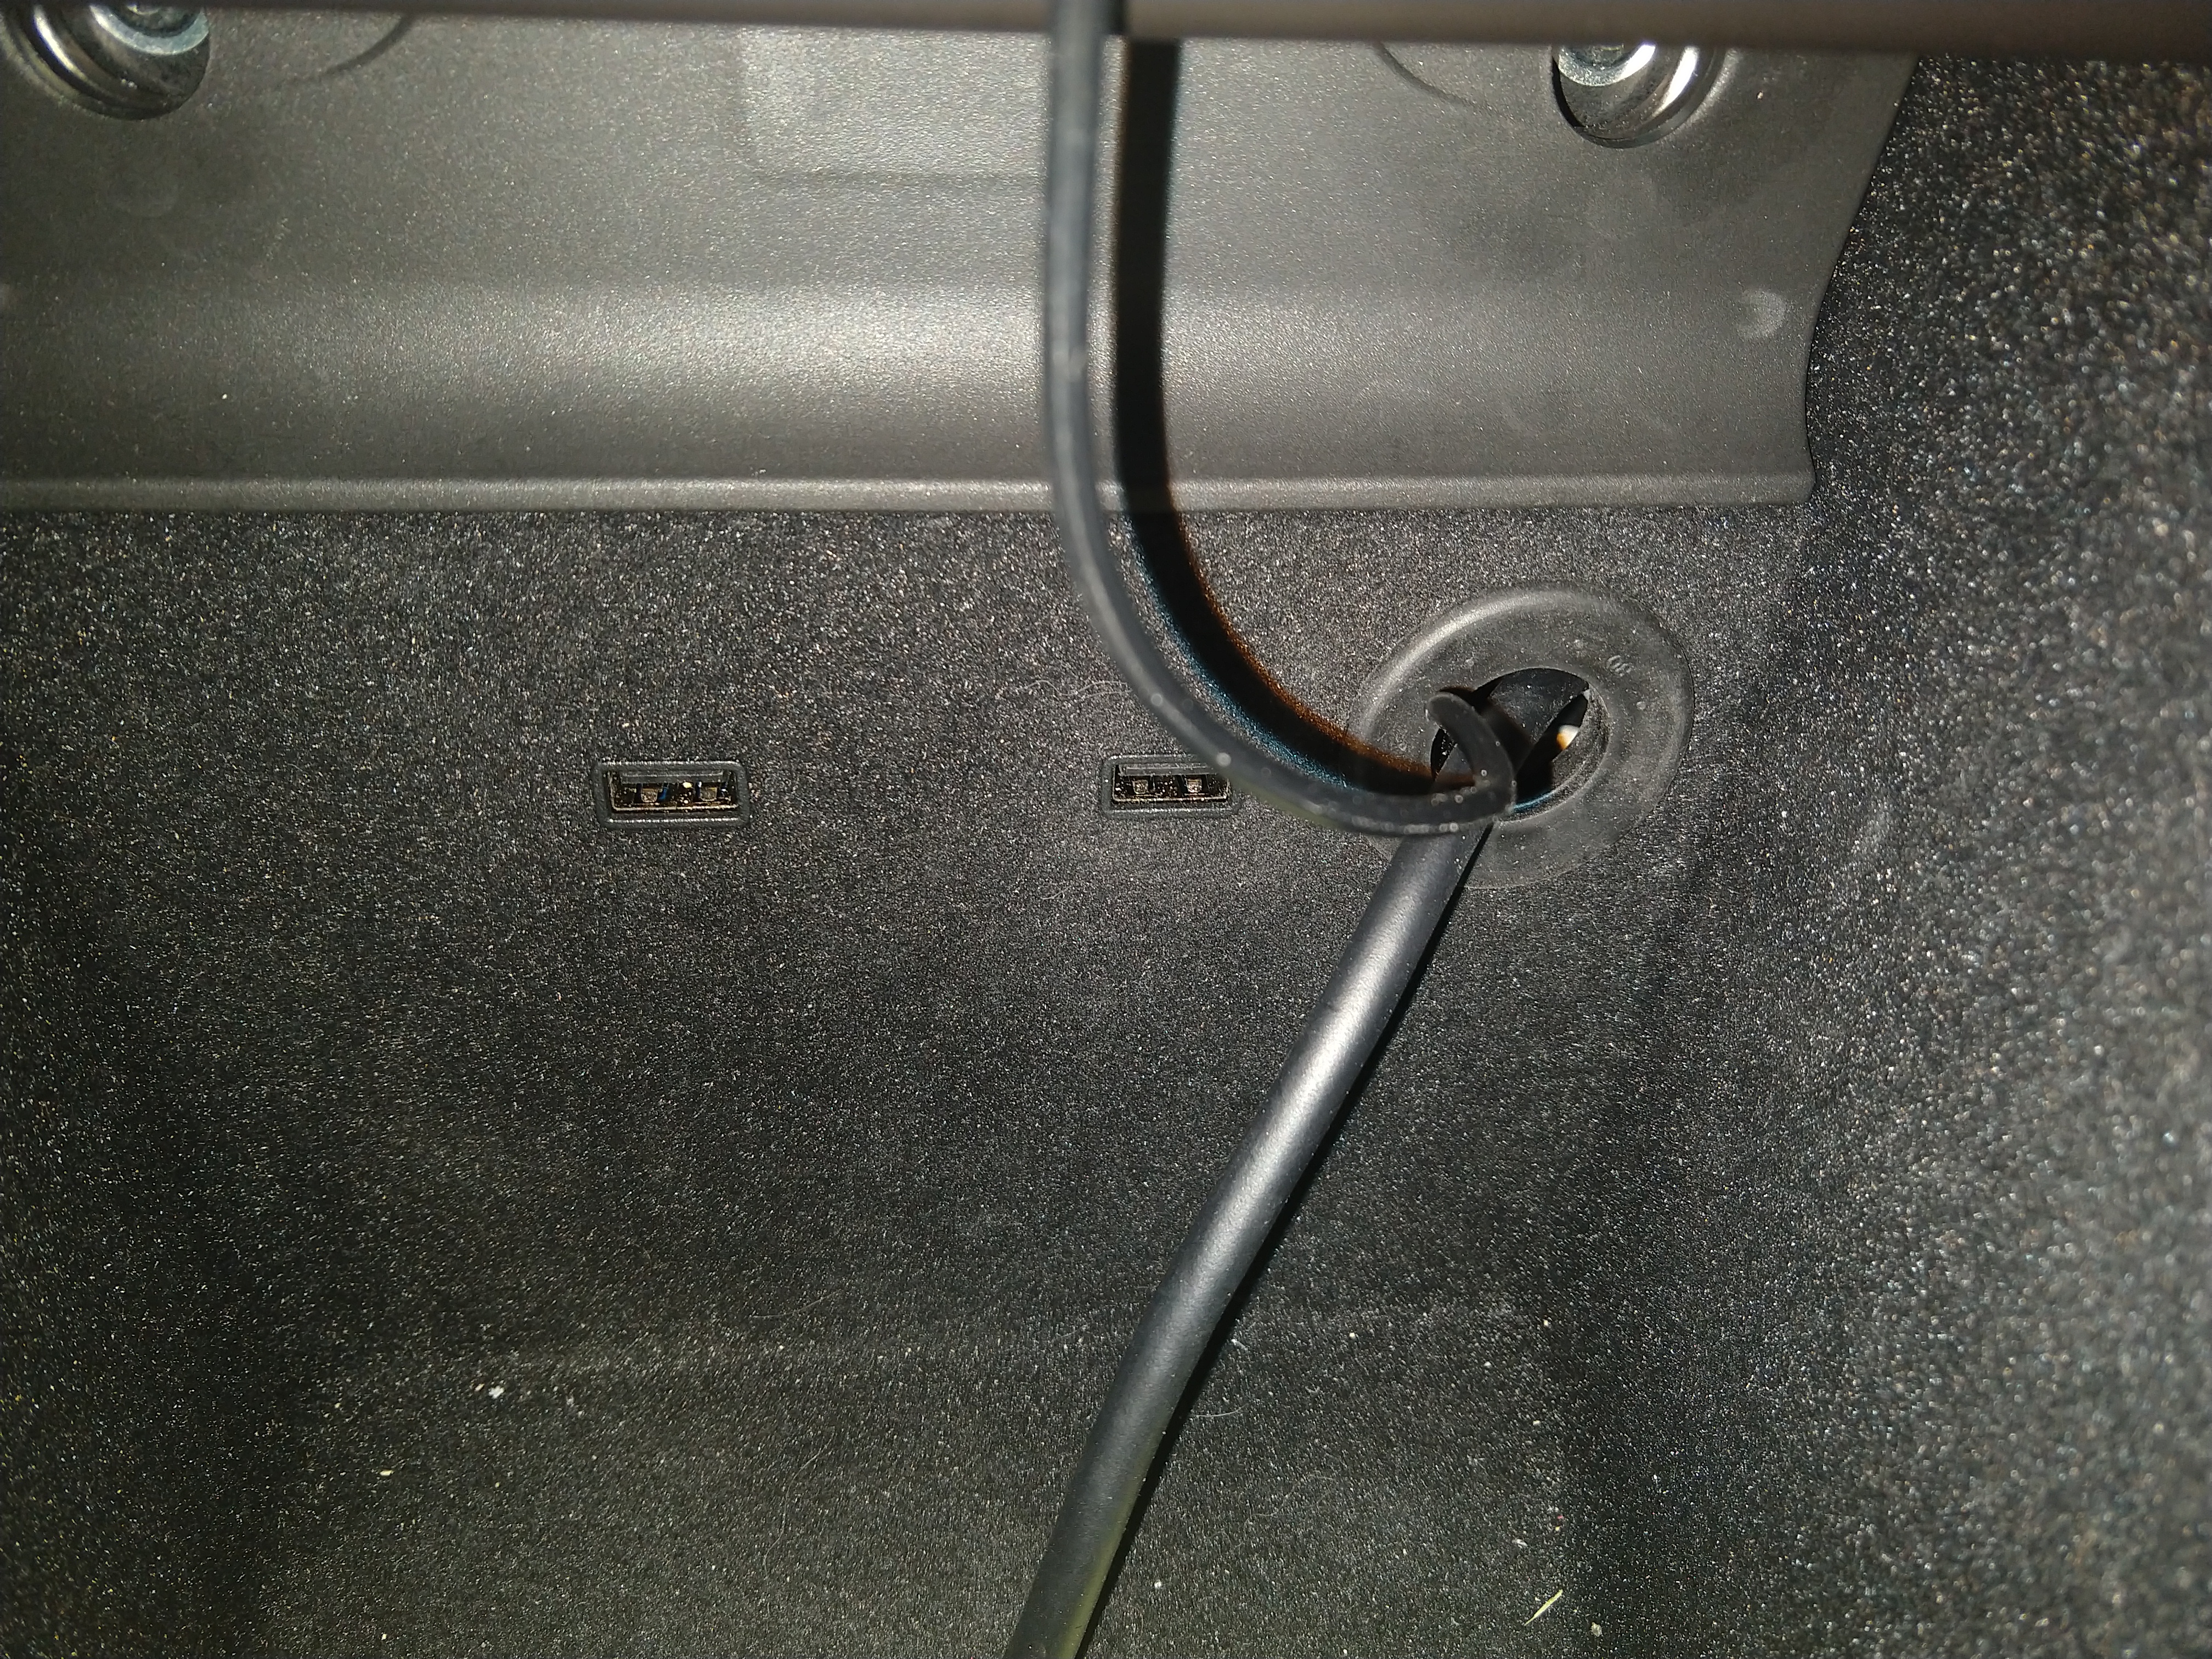
Run the coax along the existing wiring to the rubber conduit that leads to the vehicle body.

Coax Pull
Pulling the coax through the narrow rubber conduit was difficult and time-consuming, but I absolutely did not want unsightly coax dangling from my trunk. This was my approach:
- Push some stiff-ish wire into the bottom and up through the top, bending it as necessary.
- Connect the GPS antenna coax and pull it through.
- Connect the main antenna RF coax to the GPS coax and pull it through.
As I had no cable lube to help me, I used a mixture of cornstarch and water (4 tsp + 1 cup, slowly boiled) to act as a lubricant. Since it is not petroleum-based, it would not dissolve any of the internal materials and would (hopefully) dry and/or coagulate quickly.
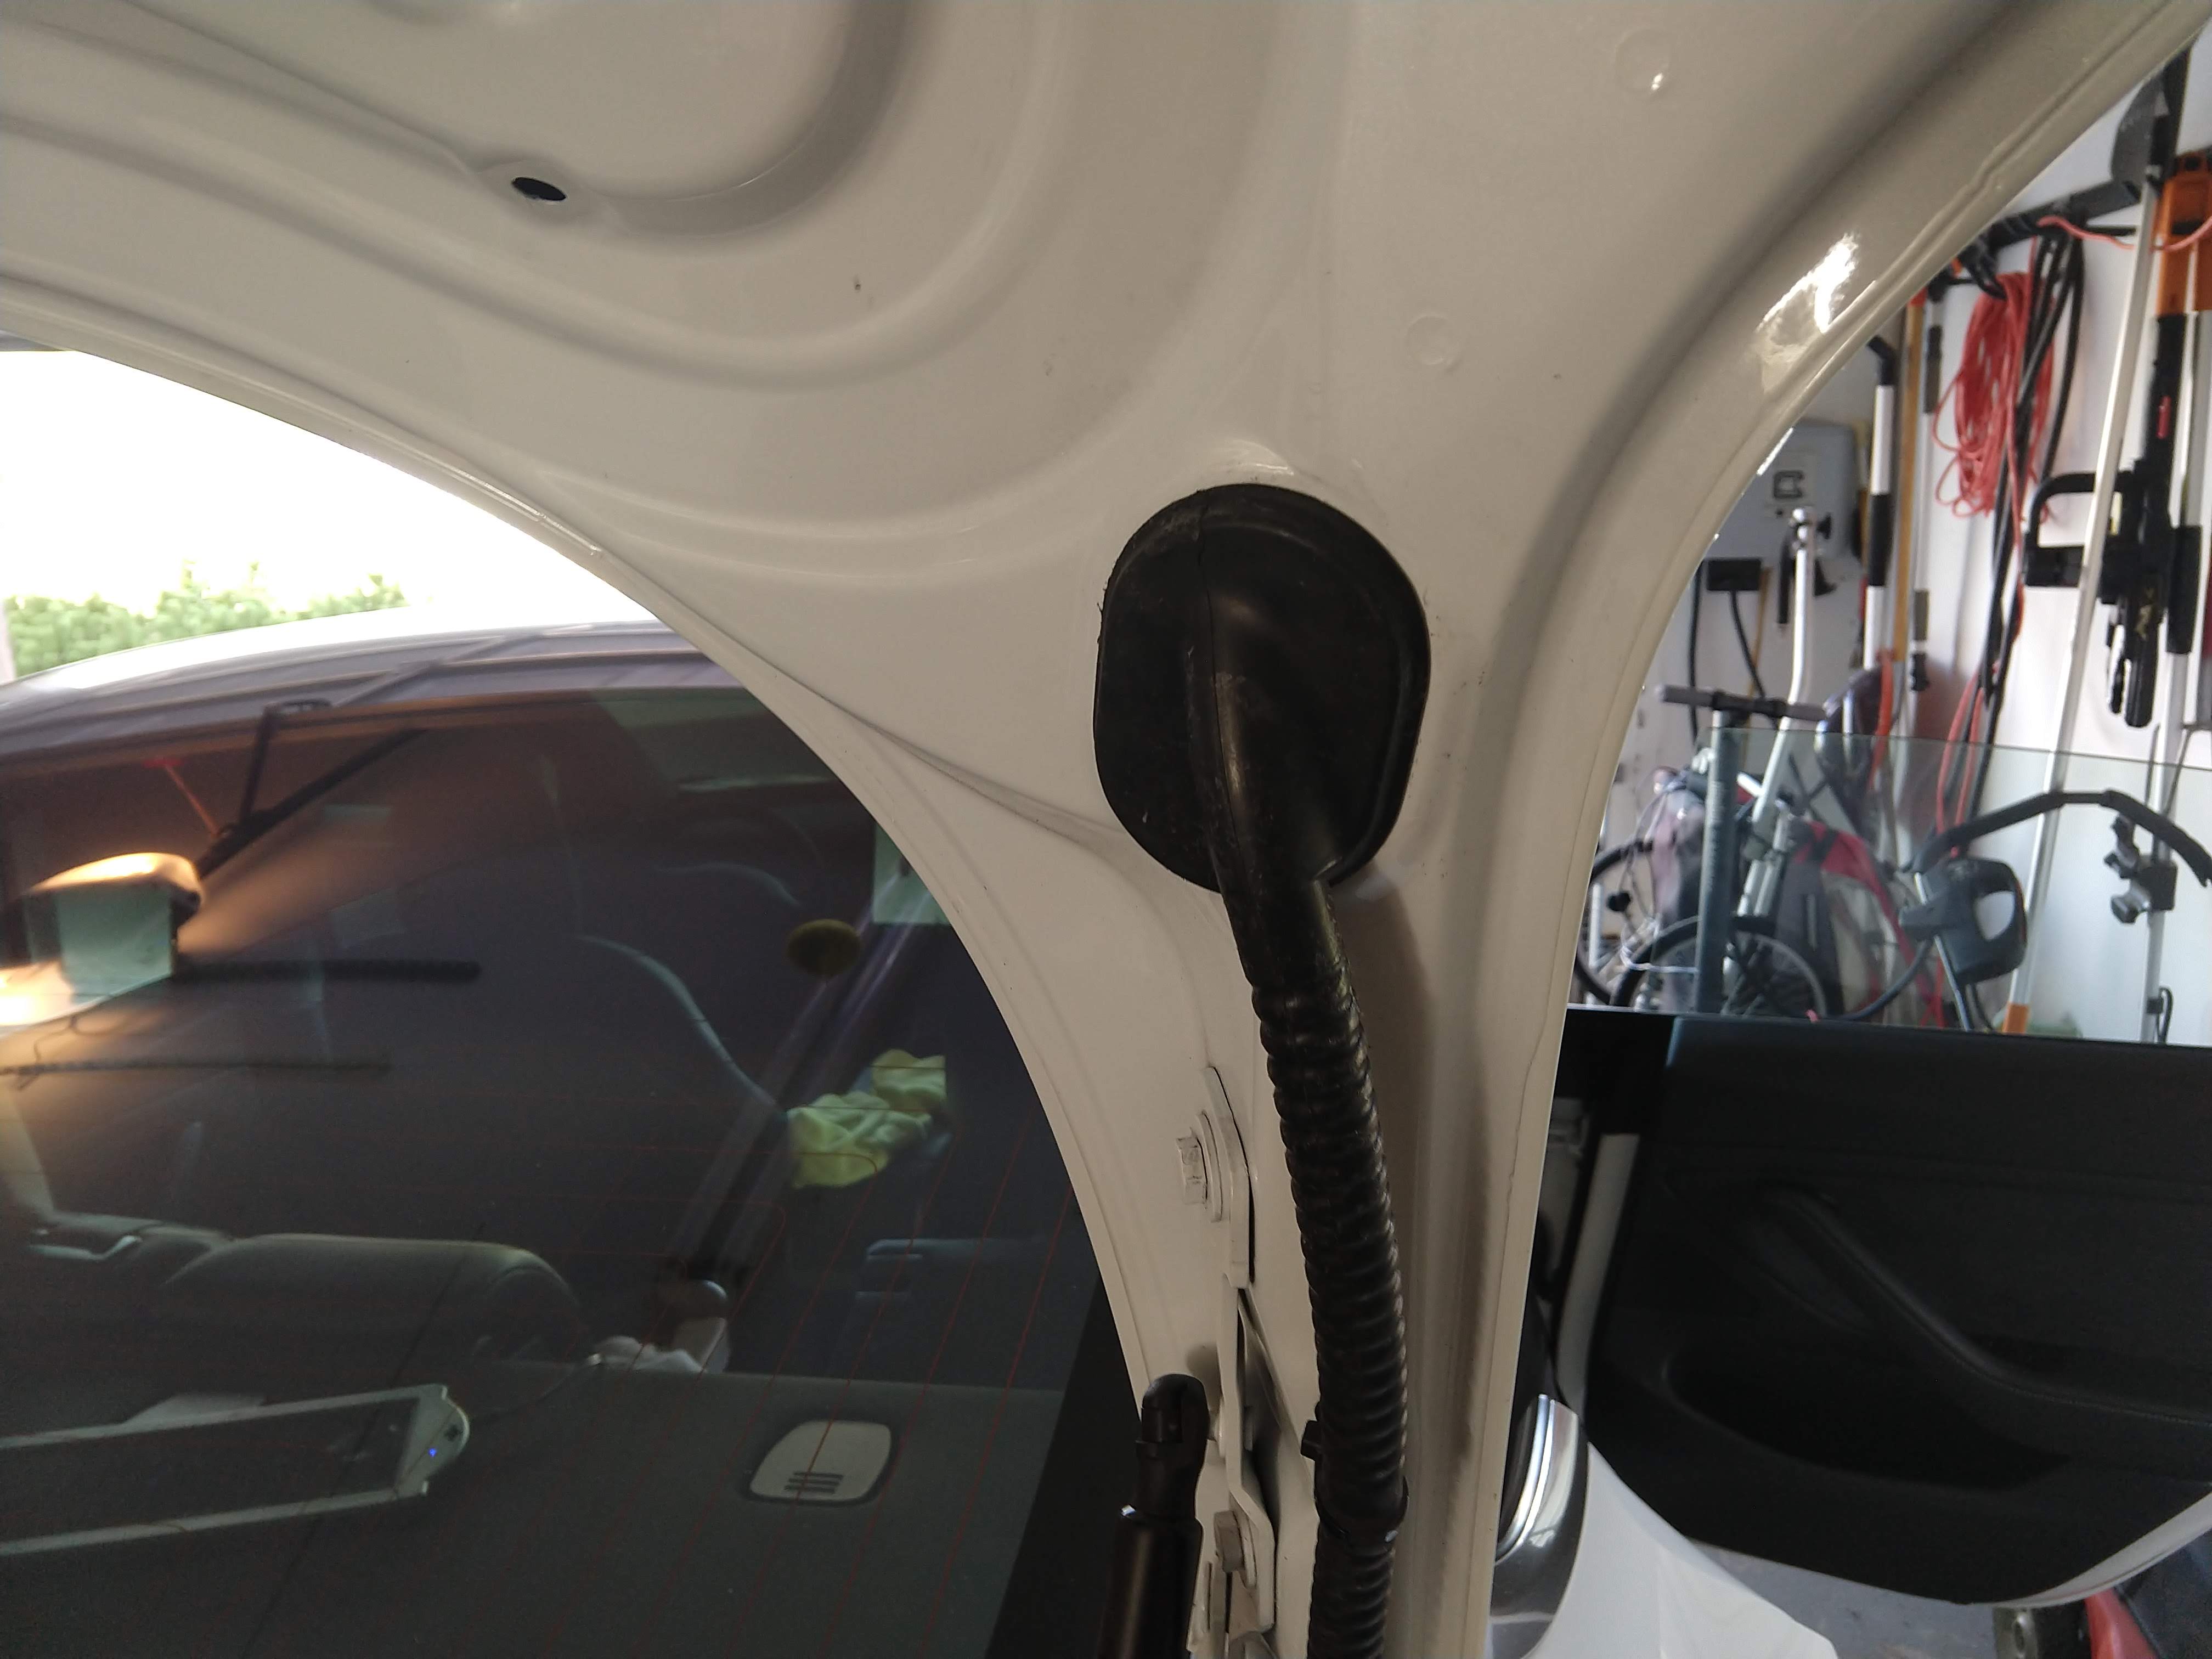

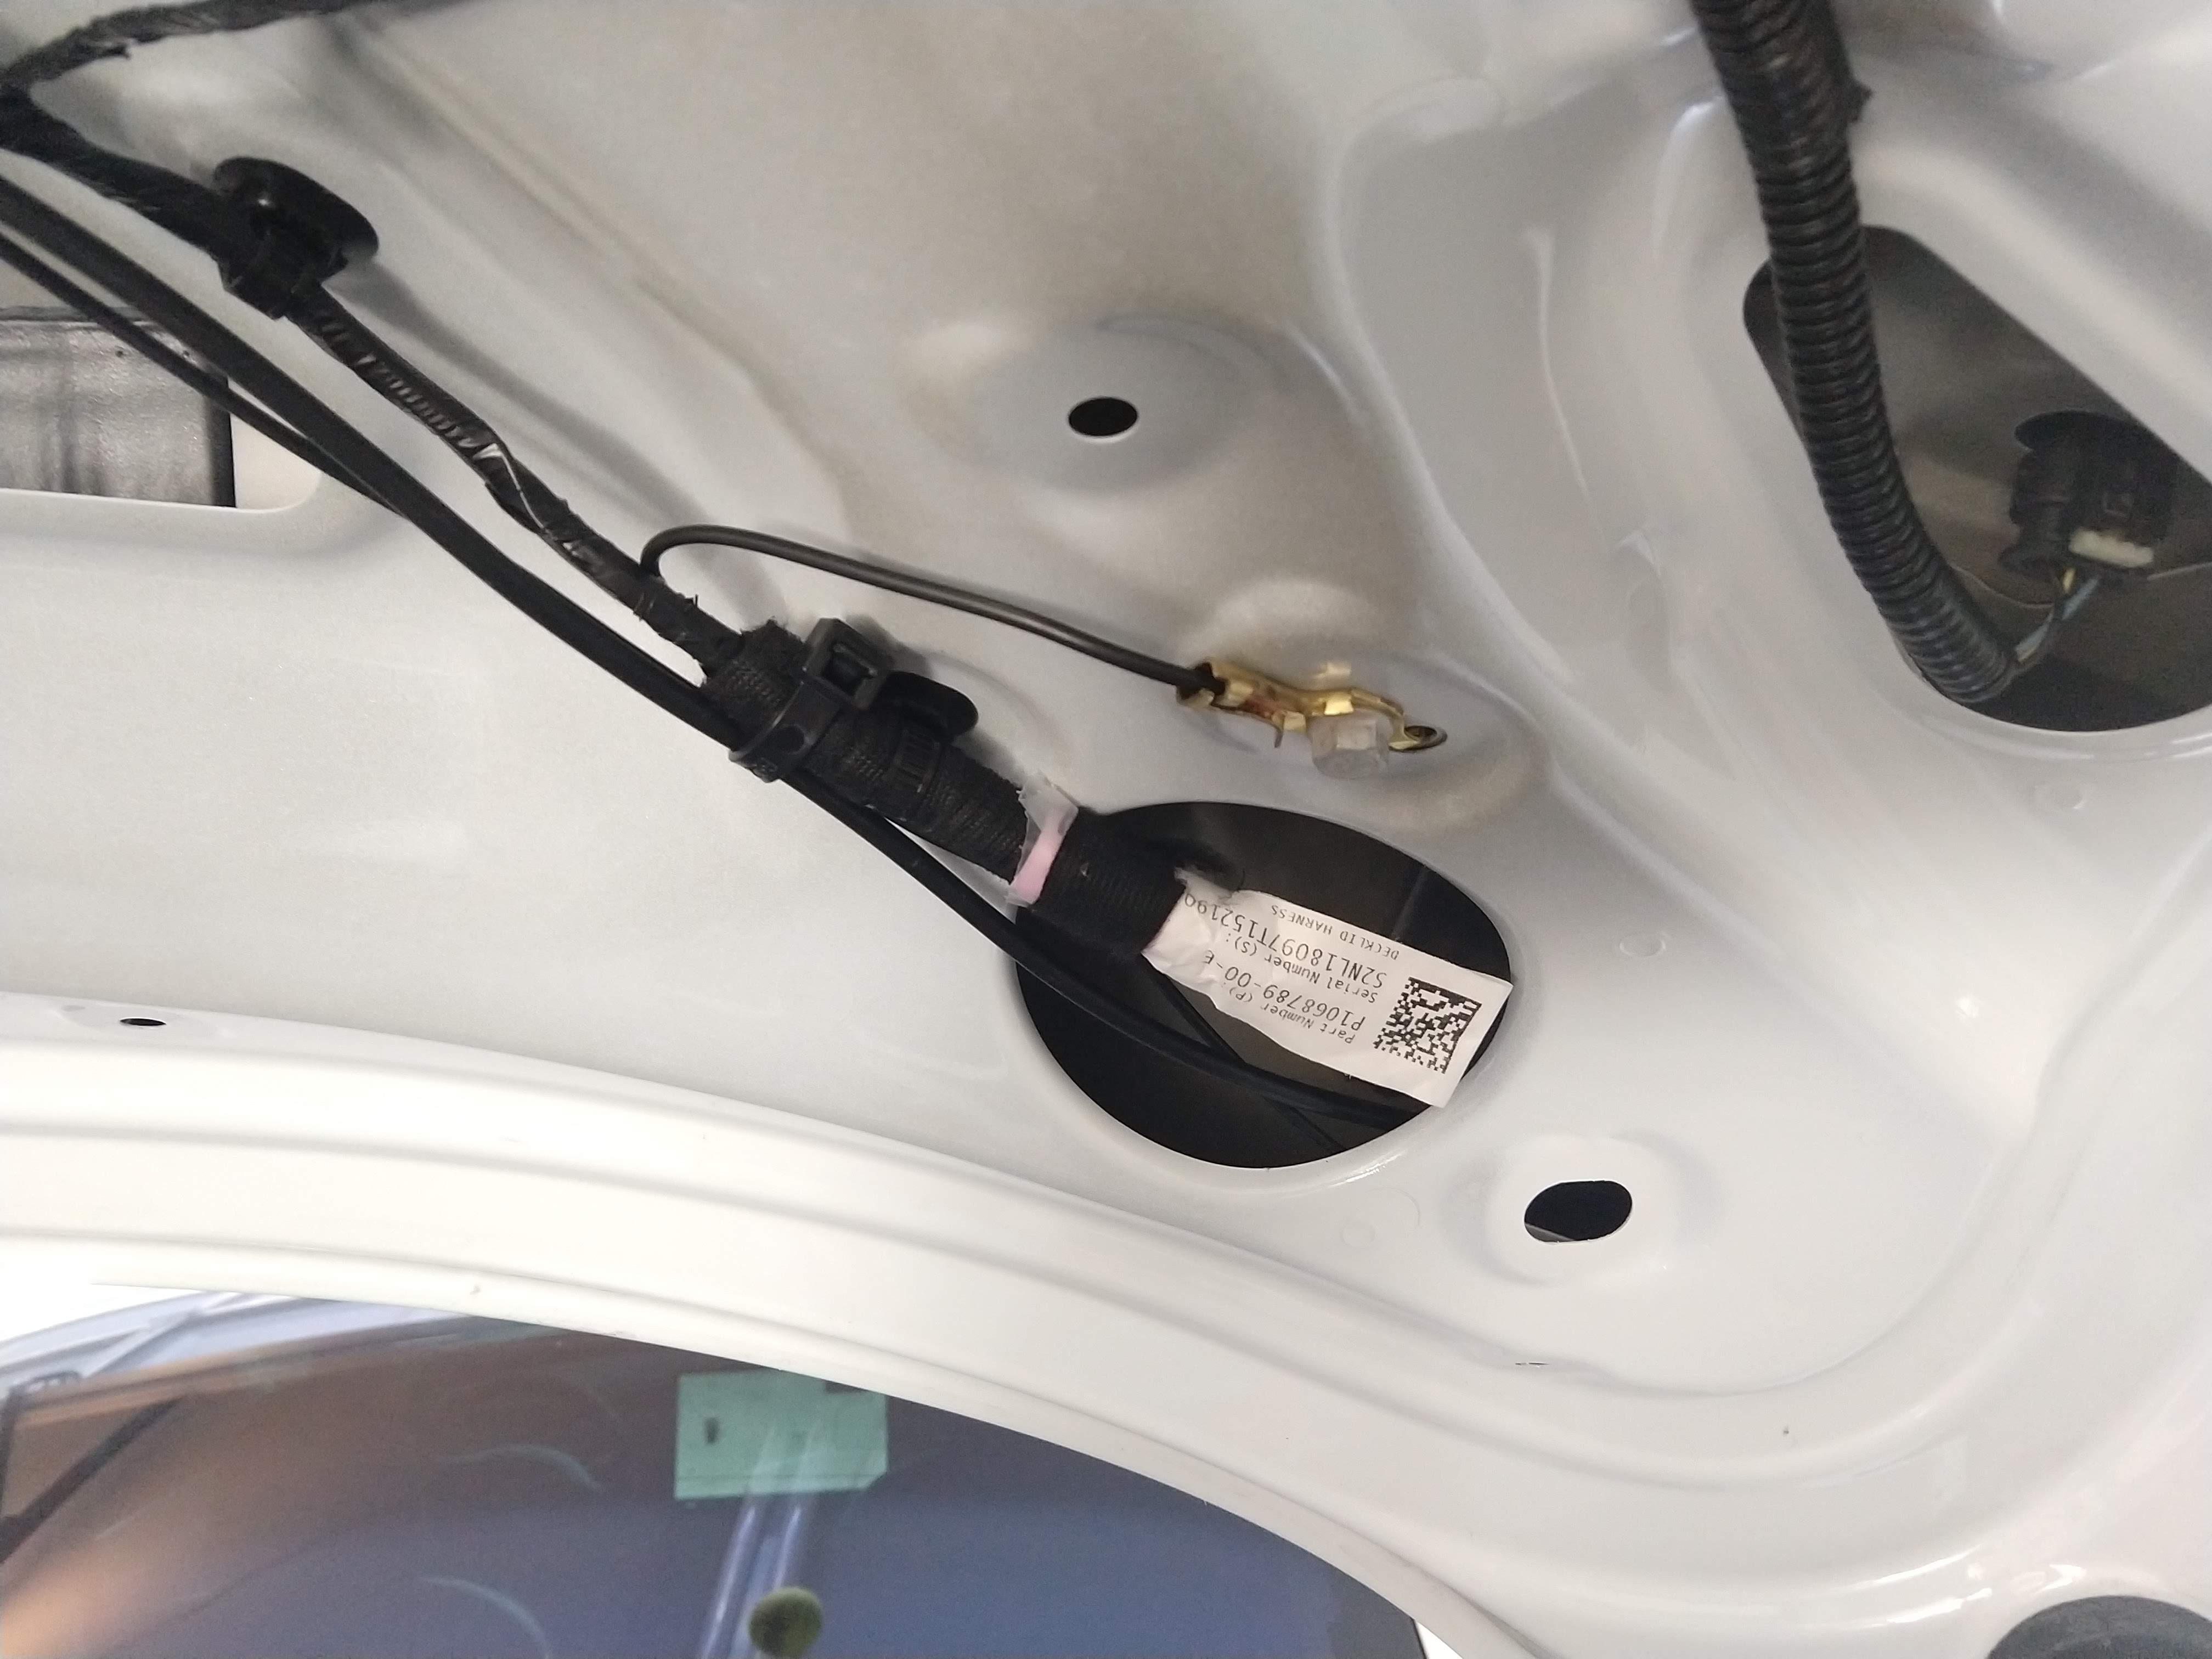
After the cables were through the conduit, I needed to pull them one more time into the trunk area. There is a small access port that allowed me to push/pull the coax though into the trunk behind the liner on the passenger side, and from there I terminated the coax, ran it to the radio, and coiled and hid the extra. I wrapped the coax that rubs against the interior access hole with extra rubber and electrical tape since that part of the body has no rubber grommet.
Final Checks
I used the VCLEFT switched 12V power to connect to the radio’s accessory connector pin #26 for ignition sense. This allows the radio to turn on and off automatically with the car. The radio is connected to constant 12V power but turns on/off with the vehicle’s accessories.
ℹ️ Add a power-off delay to the radio so it isn’t constantly turning on and off as you open/close doors2.
After tightening everything down and buttoning everything up, I did a parrot test on BrandMeister 9990 and everything sounded good.
Concurrent Project
Simultaneously with this project I installed a Stealth EcoHitch and wired it using the Tekonsha ZCI harness. I went through many iterations of programming the controller and double-, triple-, and quadruple- checking the right side turn signal wiring before realizing that my right-side trailer brake light was burned out. 🤦♂️
If I had it to do over, I’d use the 119190 kit that directly taps the wires just to make it a bit easier.